EASY DIY FAUX WEAVING

I've had this awkward space above our living room TV (which mind you sits at an awkward angle cause Blake insisted on there being NO glare on our tv from the window-insert eye rolling emoji here, ha!) that I've been searching for the perfect piece for! We had a West Elm faux taxidermy giant deer head up there, but I'm kinda out of the animal head phase if I'm being honest. 

So, I decided to dig up my rusty craft supplies and get to work!

I knew this way I'd be able to create the perfect sized piece with just the right amount of boho!

I began looking online at different DIY faux weaving tutorials cause I was not excited to build a weaving kit and spend days working on a weaving project. Luckily, I stumbled across the BEST tutorial from A Beautiful Mess, and I just tweaked their tutorial a bit to come up with my own! 


And guess what?!?!? I had EVERYTHING in my home already, spent a total of 3 HOURS making it, used about $20 of craft supplies and never left the comfort of my living room! The best part about this tutorial is you can literally customize the size, color and texture to fit any space in your home that needs a little update! 

(sorry in advance for the horrible lighting in the pics. I am soooo impatient and had to do this at night time when the girls were asleep!)


STEP 1 : GATHER SUPPLIES. 

  • yarn for tassels (I have sooo much yarn in my craft room and I just grabbed the colors I knew I wanted to use to match our living room, which is generally neutral with a touch of pink). I also suggest using the thick chunky yarn cause it looks very chic, has a more "store bought" look, it's cozy AND it's easier to do cause it's so thick! It also adds so much texture!

  • small felt balls or a thick yarn that can be placed to look like weaving at the top of the piece (they used felt ball garlands in the A Beautiful Mess tutorial, but I just used a chunky yarn)

  • a rug (like in their tutorial) or anything that's a solid color that has some firmness to it to act as the backdrop. You can also use a latch hook mat if you'd rather tie than use hot glue guns. I actually used a hard piece of particle board for mine cause it was the perfect size!

  • wooden dowel rod (like they used) or I LOVE using copper rods from Home Depot or Lowes! I love the mid century modern look the copper gives! Also some string or wire to hang the weaving.

  • hot glue, glue gun, scissors

  • wall anchor or a pretty hook (I got ours from Hobby Lobby and love that it adds some dimension)!

Here's our sweet Bella who would NOT get off the comfy yarn hahaha! 


STEP 2 : MAKE TASSELS.

For the size of my art, which was roughly 3 feet x 2 feet, I made about 40 tassels, but remember I also used very chunky thick yarn. For thinner yarns with less volume, you'll likely need upwards of 70 tassels. This also depends on how big you want your piece.

The tassels are the most time consuming part, but even so it only took me about 2 hours to make! I just binged Netflix with the hubs and listened to him make fun of me for spending so much time making "shag rugs for the wall." ahhahah! We had a blast lol. 

You can see the A Beautiful Mess tutorial here, but I will do a tassel tutorial soon! I feel like I've mastered them and will share a video as soon as I can! 

This is also a great time to figure out the color layout of your tassels and if you'll have enough for the space you're wanting to fill. 


STEP 3 : GLUE TASSELS TO THE BACKDROP.

This parts so fun! This is when all of the time you spent on making the tassels finally pays off and you get to see your weaving come to life! I can't wait to see the creations you come up with!

Tips: Make sure you spread out the tassels on the bottom layer, because the layers above them will "fill in dead space". My suggestion is to spread out the tassels on the backdrop and if there's too much dead space you may need to make more tassels. I ended up filling in a few areas at the end of the project. It's easier to go back in and fill in spaces than to not have enough yarn, so start out wider and fill in as needed. Does that make sense at all? Ha!! 

You'll only have to glue the top "ball" portion of the tassel. Everything else on it will hang loosely. 

Here's a look at the particle board I used as my backdrop too btw! (And Bella creepin on the comfy chunky yarn again)


STEP 4 : GLUE TOP FAUX WEAVING.

This part may take a few tries, but essentially you will either glue the felt balls down (like in their tutorial) or use chunky weaving and puff it up randomly to make a "weaving" look. It's really hard to explain in words, so hopefully this pictures shows you what I mean haha! 


STEP 5 : SECURE ROD AND STRING TO TOP.

Here's a closer look at the copper rod I used at the top of mine. Again, just hot glued it to the particle board! I then had Blake drill two holes on the sides of the weaving and I strung heavy copper electrical wire to the art! 


And here's the finished piece! I hung it in another spot to get a good picture of it with the girls, so you can see it styled a couple different ways! 


Andddd...here she is in her new home!!! I absolutely love it and keep smiling at it every single time I pass it. It's also the very first thing we see as we walk down the stairs in the morning!

Blake keeps saying "Amy, I love the new shag!" hahahah! oh, my life. ;) 


Happy crafting!

xx, Amy

DIY HOUSE SHELVES

You asked, and you shall receive! Our DIY House Shelves' plans are finally here!

Note*** We did not include actual instructions for putting the shelves together, so this is not a beginner project. We simply included all of the measurements and materials we used for anyone who knows how to work their magic with a saw! 

If you have any questions, please feel free to comment below and we will get back to you ASAP!

You can download the PDF here to print at home and take with you! 

HOUSE SHELF PLANS 2018 copy.jpg
 

And here's a look at all the pics that made these bad boys famous! 


Can't wait to see your projects! Be sure to tag us on instagram @theeverco or @amylouhawthorne!

FOURTH OF JULY FESTIVITIES

The week of the Fourth is such a sweet holiday for our family, because we always know Blake and I will have time off from any military obligations and can truly spend quality time together. 

It's been so nice to have daddy home and to enjoy celebrating America!

Here's a look into our week and all of the fun family traditions we have. We have LOVED following along with all of your traditions on Instagram and seeing you make memories with your loved ones! 

We started the week with a little dance party (to Party In the USA) to kick off our long week of fun!


On the night of the Fourth, we had our annual (tiny) front yard fireworks! We started doing this three years ago when Everly was just a baby and have loved having mini fireworks just for our little family!

KN2A3862.jpg


We also enjoyed some more fresh farm picked watermelon and drew the cutest fireworks chalk art! You can see more of my chalkart under the #hawthornegirlschalkart hashtag on Instagram! 

Funny story about this pic...I am the most horrible watermelon cutter ever. If I concentrate REALLY hard, I can make it look decent...but I can fly a helicopter; just don't ask me to cut your watermelon. Ha! So, this time I just cut big pieces off and we ate out of it with spoons. And let me tell ya, it was just as delicious + juicy! 


With all the time off work, hubs and I took the girls out back and we had a blast playing ALL DAY in our little blow up pool! I grew up playing softball, and Blake's just a great athlete, so we spent a few hours throwing the ball in the backyard while the girls played monkey in the middle! 


Then came the fun part! Every year, for the past three years, our incredible neighborhood has thrown a huge Fourth of July celebration.  We have a huge Easter egg hunt and Friendsgiving (for Thanksgiving) as well. We live in a neighborhood pretty far out in the country, so it's a very small secluded one, surrounded by trees and the simple sweet sounds of nature! But it allows all of us to be more like family. We help each other out during deployments, take care of each other's dogs and kids, do house projects together, and the list goes on. I know because of this neighborhood I will never ever settle for a neighborhood we don't love again. 

This neighborhood means so much to us. Not only have we made the most incredible memories here with the best of friends, but we've also raised the girls here. It's the first house Blake and I have remodeled and truly poured our hearts into. We will be moving around December of this year, and our hearts are already trying to prepare for so much change and sadness that comes with moving every few years with the Army. We're just ever so hopeful that we'll find another neighborhood, just like this, where we too can start a new tradition of annual Fourth of July parties. We're so excited to continue this tradition somewhere else! 

For the party the house with the biggest acreage rents a huge bounce house/water slide and all the neighbors pitch in money. They also are the ones that buy all of the huge fireworks and we all pitch in money for that too. Their backyard is huge so all the dads tag team to put on the BEST fireworks show ever! It's truly incredible what a few thousand dollars and a bunch of great neighbors can throw together. Everyone brings food so it's potluck style and we all wear glow in the dark necklaces and it's basically a big Fourth of July kid friendly rave! It's truly the best time ever. We're gonna miss it oh so much. 

Here's a look into our very own backyard fireworks show! 


I also made these super yummy stuffed sweet peppers which is our favorite appetizer to make for Cinco de Mayo and Fourth of July festivities!

Ingredients:

  • 2 x bag sweet bell peppers
  • 1-2 8oz. cream cheese
  • 1 roll sausage (flavor of choice)

Directions:

  • Cut peppers in half and clean. 
  • Cook sausage until brown and add in cream cheese.
  • Stuff all peppers with mix. 
  • *You can sprinkle breadcrumbs or shredded cheese on top if you want.
  • Bake at 350 degrees for 20 minutes.
 

We ended the week with baking some good ole Fourth of July cookies to give to our brand new neighbors! You can find my favorite recipe here! 


Thank you for following our holiday celebrations and we sure do hope they inspire you to create traditions and make memories with those you love! 

SUMMER BUCKET LIST


To put it simply, we created this business to inspire you, wherever you are, to create family traditions with those you love most and to make memories that will last forever.

Every holiday, and every season, we aim to bring you a bucket list of sorts to inspire you to do just this, and we are finally ready to bring you our first HUGE seasonal bucket list to celebrate:

THE BEST SUMMER EVER! 


Here are some of our favorite pictures in celebration of these bucket list items! The owner's of each image are tagged below their pic, and you can also see more at our Instagram account or through the #thesweetestsummerbucketlist hashtag! 


Backyard pool party with  @amylouhawthorne

Watermelon eats with @brittneymcnutt

Water park hangs with @ashwisdom in our Vacay Vibes tee! 

Hammock relaxing with @underthesycamore

Finding lifeguard shacks with @House_of_lu

Road trippin with the @inhonorofdesign family

Beach hangs with the cutest floats and @jessiepennington

Collecting seashells with the cutest girls of @lovesarahschneider

Strawberry pickin with The Ever Co founder @amylouhawthorne 

Ice Cream cones with the gorgeous girls of @jlgarvin

Beach photoshoots with the best family @haleyrring

Baseball games with the cutest kids of @graceandsalt


To thank you for joining us on this journey, we've included a free printable of our bucket list as well as a fully customizable bucket list for you and yours!!! Be sure to share with us if you print and use it! We can't wait to see you making memories! 


We truly hope you're inspired to make memories and create traditions of your own! Happy bucket list adventuring! Be sure to tag #thesweetestsummerbucketlist so we can see your adventures! 

STRAWBERRY PICKIN

Every year we go to the strawberry patch around Memorial Day weekend. Blake and I started going many years ago, but now it's the SWEETEST tradition to do with our little family tribe!

Strawberry patches never disappoint for littles, and they yet again had a BLAST! 

And after we bring all our berries back home, Blake always makes the yummiest homemade strawberry shortcake from scratch. So thankful he has a sweet tooth too. :) 

The girls tasted one and they were a little sour hehe

little Hadley Rae

and our little Everly Brynn

One of my favorite pics. Loved walking down these strawberry rows with my girls. 

How are these our girls? So grateful. 

These two! 

We'd always rather be outdoors. 


We found a yummy watermelon too! 

We hope you make lots of memories with those you love most. Memories that are sure to last forEVER. 

xx, Amy + The Ever Co

KENTUCKY DERBY AND CINCO DE MAYO TRADITIONS


Being a Kentucky girl, we ALWAYS celebrate Derby day! But when it falls on Cinco De Mayo, it is a super duper extra special treat for us here at The Ever Co!


Blake, our Ever Co papa bear, LOVES LOVES LOVES him some Mexican food, and for Derby I always make an antipasto platter with Kentucky bourbon sliders! 


Rug: Rugs USA

Table Runner: Anthro (similar available at Target!)


So today, we're having our traditional Derby food for lunch and our taco bar for dinner! 


This morning we started the day with a milk bath for the girls and let them both take their horses in! They loved it so much cause typically their horses stay downstairs in the toy bin.  They're both not old enough yet to understand the Kentucky Derby, but they do both love horses! 

MILK BATH RECIPE:

  • 1-2 cups milk of choice (breastmilk, cows milk and powdered milk all work)
  • 1/2 cup cornstarch
  • 1-3 drops lavendar oil
 

Hair Clip: Ryan and Wren


We then turned on our ALL TIME FAVORITE show, SPIRIT: Riding Free on Netflix! Everly is absolutely obsessed with the show and Hadley just ADORES dancing to the intro song!

After some screen time, we always try to go outside to play before naps. We let the girls take their horses outside (something we also typically don't let them do) and it was precious watching them play with the horses after watching the show.


We gifted Everly her very first Spirit + Lucky set today and we think we've started a new tradition of giving the girls a new toy horse every Derby! It'll be so fun to see their collection grow over the years and it'll be something they look forward to every year...that is until they start asking for a real horse! :) 


During nap time, Blake and I watched Seabiscuit, one of our favorite movies! Tonight we plan on watching Warhorse to end the night after the girls go down to bed. 

A couple hours before bed we FINALLY got to watch the main event! The Derby!!! It is always so much fun watching the horses every year, and I can't wait to take the whole family to the Derby in real life one day!

After the Derby, we finished the night with the girls watching CoCo and eating our dinner which you can read about below! Our dinner was all about Cinco de Mayo. We just love making these traditions with our family. 

Now on to the food! 

For lunch, we made our traditional Derby appetizers/ lunches: antipasto cheese platters and Kentucky Bourbon sliders! (with a side of margaritas. :) 

Here's what I always get for my cheese boards! 

  • Smoked Gouda Triscuits
  • Ritz Crackers
  • New York Garlic bagel crisps
  • Salame
  • Proscuitto
  • Minced Garlic
  • Roasted Red Peppers
  • Capers
  • Kalmata Olives
  • Garlic dip
  • Mozzarella balls
  • Cheddar cheese
  • Feta


Here's the ingredients + instructions for the sliders!

  • Roast Beef or Beef Brisket (I used the Jack Daniels Beef Brisket from Walmart!)
  • American Cheese
  • Mayo
  • Hawaiian Rolls

For dinner, we made our traditional Cinco de Mayo taco bar! (with a side of margaritas yet again. :) 


Here's what I always get for our taco bar! 

  • Hard and soft taco shells
  • Multigrain tostito chips
  • Green Peppers, onions, red peppers (for fajitas)
  • Fajita chicken and beef
  • Ground beef or turkey
  • Corn
  • Salsa
  • Hot Sauce
  • Sour Cream
  • Guacomole
  • Refried Beans
  • Mushrooms
  • Mexican Rice

We sure do hope you've had just as much fun with your family celebrating both Cinco de Mayo and the Kentucky Derby! Next year, if you don't already, maybe you can incorporate some of these traditions with your family! We're big believers in celebrating everyday like it's a holiday and creating traditions that'll last forEVER! 

I'll end with some cute pics that we got of our little Hadley bug wearing her Derby gear. :) 


Hat: Target last year

Outfit: Thrifted

Shoes: Old Navy


xx, Amy + The Ever Co

TIME MANAGEMENT HACKS 101

It's pretty ironic, if I'm being honest. I thought getting off Active Duty Army status would give me more time to focus on this business and myself. That I'd finally be able to put all of my energy into my family and The Ever Co.  I thought being a stay at home mama meant watching Netflix and Hulu all day while drinking coffee and sitting on the couch.

wrong.

Honestly, I feel more busy now than I ever did before! Ha! I can hardly ever remember what day of the week it is. When I was working, you better believe I ALWAYS remembered how many days were left until Friday. ha! But...

Much of it is the season of life we're in.  

Battling grief with the loss of my daddy . 

Learning the ropes of entrepreneurship and starting our business

Receiving Everly's autism diagnosis and endless therapies.

Cuddling my littlest who's in the heat of separation anxiety and has health scares of her own.

Loving my hubby who is very busy with Army life. 

Going from two steady paychecks to one.

And all the in between. 

But one thing I've learned since being home: TIME IS PRECIOUS! If we manage our time wisely, we don't have to feel as overwhelmed with ALL THE THINGS. 

So let me start with this: it started in December of 2009.

I was depressed. To make a long story short, I was living in a little apartment in Auburn, Alabama and went a few days without throwing away any trash or doing any dishes because I was in a rock bottom moment in life.

Someone finally came over to help me clean up (which by the way is crazy, because I am a neat freak - but that’s what depression does to ya). When they came over to help, I had maggots in my sink.

my life has never been the same.

That was the first moment in my life that I realized, no matter what season you’re going through-there are expectations that must be met and responsibilities that must be tended to because we are adults! I had nobody to pick up after me or check on me. And it was that moment that I knew I needed to figure out how to manage life and manage responsibilities all in one.

Truth be told, I’m actually a closet lazy person. haha! But there’s something about becoming a wife and mother that’s made my closet laziness be put to rest. I’ve realized that so many daunting tasks stink, but when they’re actually done I feel so much better about life and have so much more time! And I even feel more capable of doing these things because I have these little eyes watching everything I do. They see how I use my time every day. And I want them to emulate me. I want them to look up to me. That’s the good kinda pressure.

So, I'd love to share some of my favorite time saving hacks. Things we've either always done or I've implemented since being at home full time.  If there's anything you do that's not listed below, please feel free to share in the comments below or comment on my latest IG post over @amylouhawthorne

So here goes.


TIME  MANAGEMENT HACKS 101:

1. Become a morning person, if you aren't already one. 

The premise of this is to 'do what matters most, first, when there are little to no distractions.' If that seems completely unrealistic, and you are a night person through and through, then simply maximize the time that you work best and have the least distractions. For me, that means getting up at 5 a.m. every morning (no matter what).  Setting an alarm, not hitting snooze and making it a routine.  When I get up early, before anyone else is awake, I am truly at the most peace I feel all day. Because for the rest of the day, I feel like I'm in a blender in the midst of chaos! Ha! So why not sit in peace and quiet and focus on things that MUST get done when there are no other distractions. For me that looks like this.

set alarm for 5 a.m. GET UP. ll go downstairs (quietly) and make a warm cup of coffee. ll have face wash in the downstairs bathroom and wash my face. for me, having a clean face is critical to feel refreshed! ll sit down with my Bible and share quiet time with the Lord. it's my fuel for the rest of the day. ll tackle the most important task you have for the day. whether that's responding to emails, booking a flight, prepping dinner in the crockpot, making the kid's lunches. whatever MUST get done, do that when there are no other distractions. ll if and when there's time, I try to get my workout in first thing in the morning so I don't have that hanging over my head! 

2. Maximize your sleep.

In order to do number 1. you MUST get enough sleep.  that means backwards planning. (something we practice often as helicopter pilots in the army). Backwards planning means setting a goal for a set time or date. i.e. I want to go to bed at 10pm every night and wake up at 5am. That will give me seven hours of sleep. In order to go to bed at 10pm, I need to have dinner ready by 6pm when Blake gets home, have the kids in bed by 8pm, relax with Blake from 8-930, do my bedtime routine and wind down from 930-1000. Then Boom. Sleep. 

3. Get the kiddos on an early bedtime routine.

This is an art.  We all know kiddos are different.  My oldest has a hard time winding down. Our youngest goes to sleep quickly. That requires us to REALLY focus on routine with them.  This also really helps with traveling. The more the kiddos are on a routine, the easier it will be for bedtime.  There's so much out there on bedtime routines, but for us, we typically watch a show as a family about an hour before bedtime and after dinner.  We then limit any screen time within 30 minutes of bedtime so it doesn't affect them going to sleep. We give them one final snack then brush their teeth and just prior to laying them down we sing Amazing Grace, say our prayers and lights out.  Whatever your routine is, stick with it so you know they'll be down at that same time every night. This is CRITICAL for setting the stage for the rest of your night and the next morning! 

4. Use naps wisely.

Nap time can be the BEST time all day to GET STUFF DONE. BUT, it can also be the one time you have a minute to relax.  So this one is a toss up.  Cause guess what? Right now, the girls are down for a nap and this post is being written. If there's something that MUST get done, use nap time for that. I really wanted to stop putting this blog post off, and I wanted to write it while the ideas are fresh, so that's what nap time looks like today. But honestly? some days I just need a recharge. I need another cup of coffee, I need to binge watch Lost in Space, and I just need to chill.  Whatever you MUST get done (work or chill) use nap time for that. 

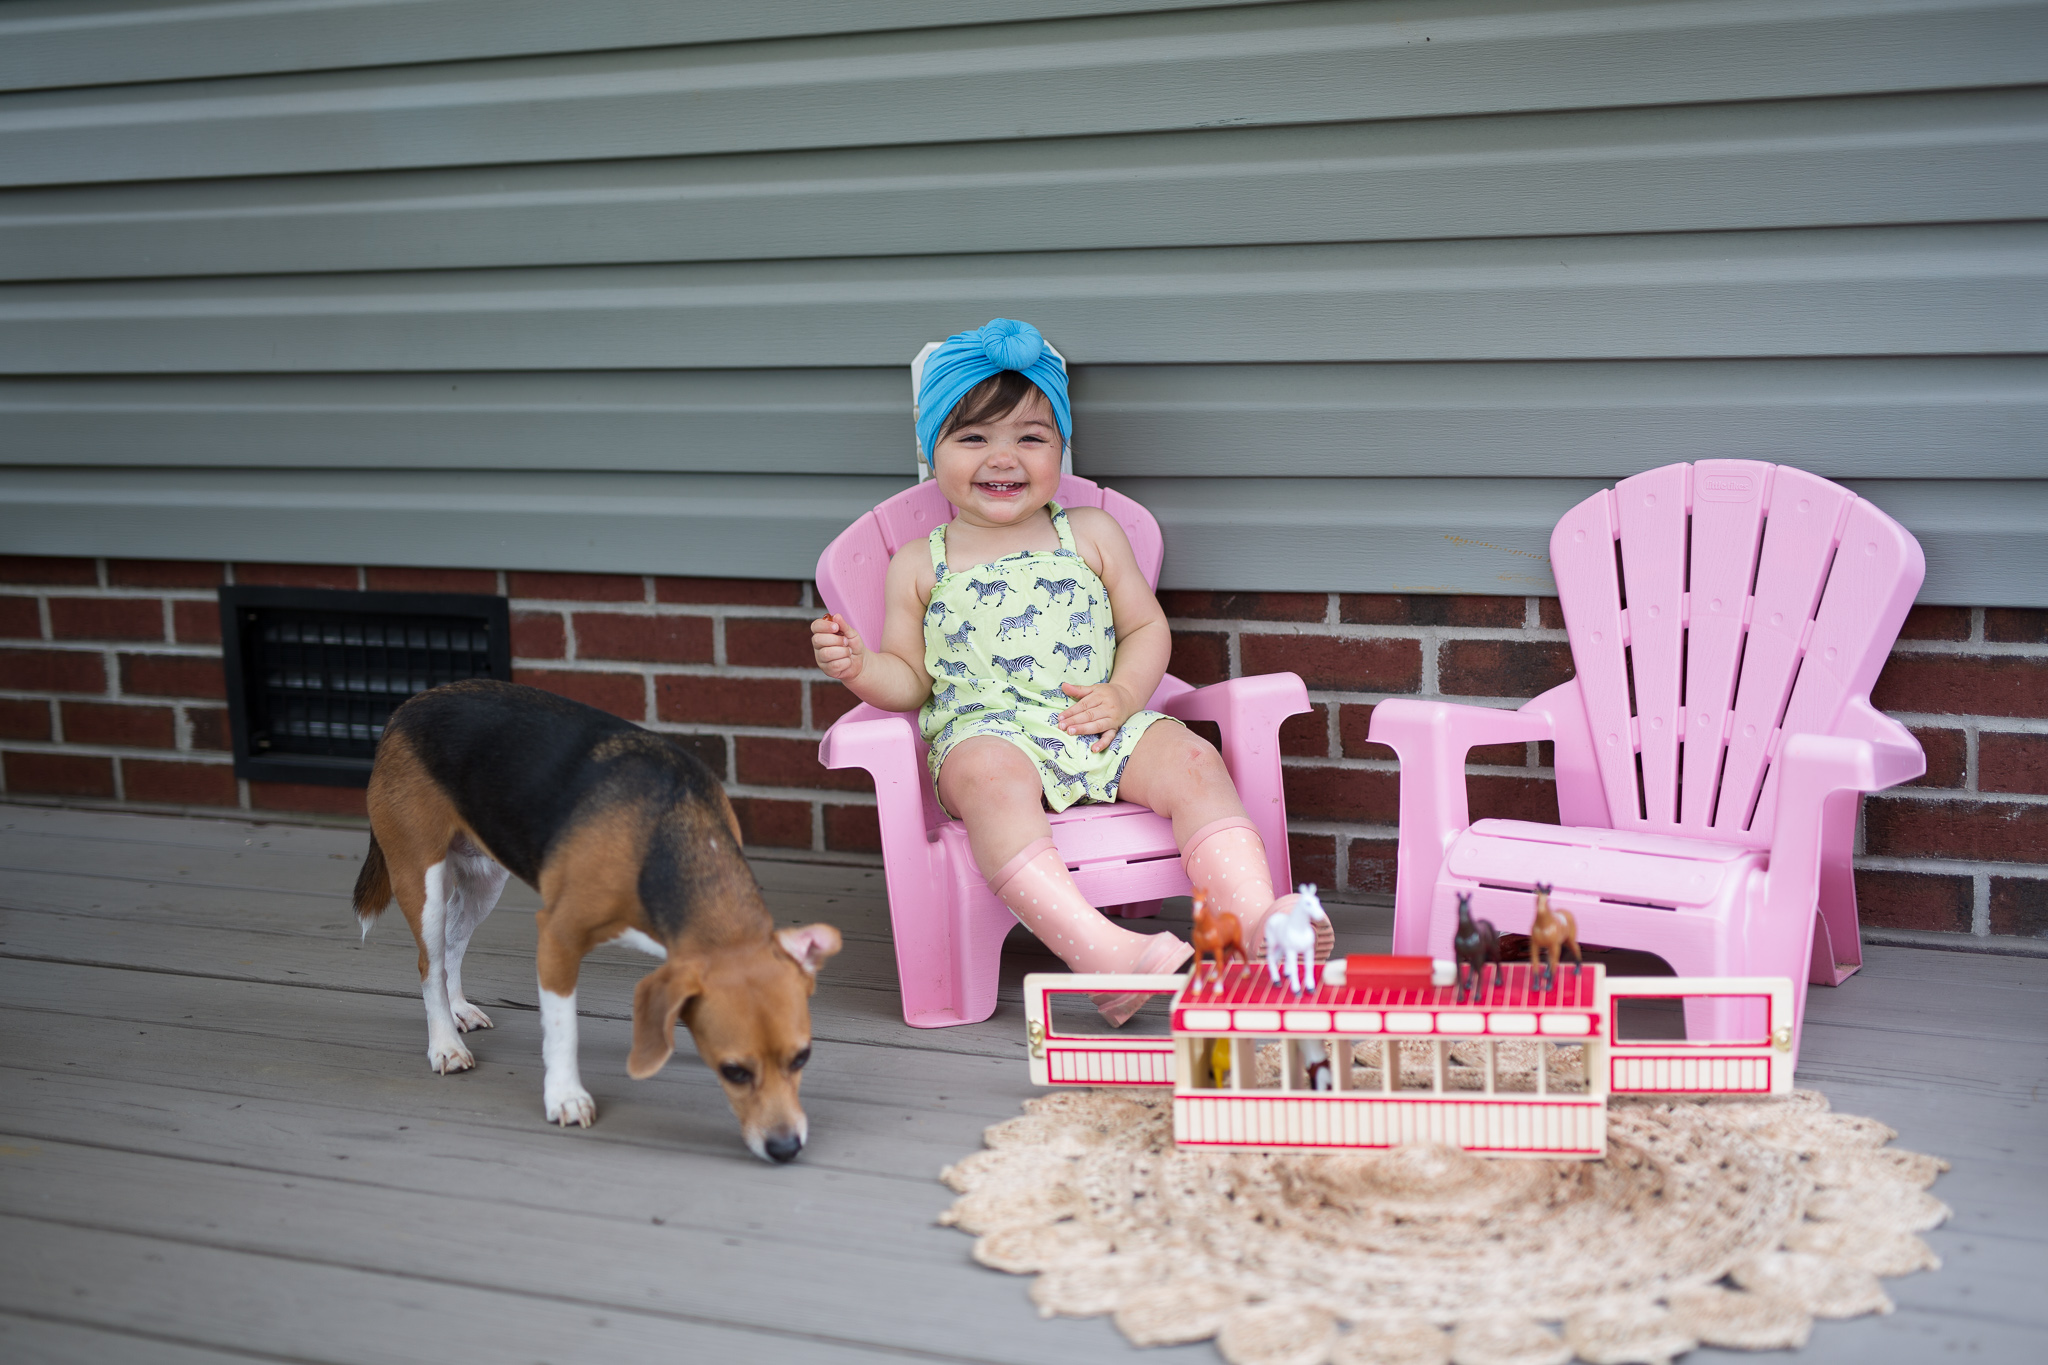
5. Change up the scenery for the kids to maximize distraction.

This is one I'm learning a lot lately since I've been home! While my girls are ALL about routine, they also get bored quickly.  While I'm an introvert at heart and love cuddling on the couch watching movies, my whole family LOVES the outdoors.  So every week we plan outdoor time. Whether that means going to the park after therapy sessions or simply playing in our backyard, the girls LOVE getting outside.  And right now, the weather is perfect for that! The good thing about getting outside is not only does it ALWAYS present something new (new friends to meet, new bugs to see, new things to learn) but it also tires them out! We try to plan outdoor time right before nap time so it makes them go to sleep easily! To go along with this, we also try to plan our "errand days" out.  This means, Monday and Wednesday are our busy get stuff done days.  Because the girls aren't in school yet, I really don't like leaving the house every day.  Instead, we pack everything we need to do outside the house on Mondays and Wednesdays when we go to therapy.  With Everly's autism diagnosis, this may change soon with MANY more therapies being added, BUT for now, this works. We go to the park, library, post office, grocery store etc. on those days and that way I'm not wasting tons of time on other days. This works wonders for us. 

6. Don't let things pile up.

This means dishes, laundry, mail, toys on the floor, etc. etc. etc. I think almost everyone has that one thing that they just don't like doing. For me, it's dishes. I've definitely gotten better at it, but they're not my best friend.  And while I'm really good at throwing laundry in...I'm really bad at putting laundry away.  My closet typically looks like a tornado with so much clean clothes on the ground because hanging clothes up is death to me. Ha! Since I'm married to a clean freak (yay!) I've learned that these little things don't have to be so bad if I tackle them little by little throughout the day versus after a week (or couple weeks) of letting them pile up! If the kids are playing with toys and they move on to coloring, I pick up their toys while they're coloring.  When the girls are done eating, I immediately either wash their plates or throw them in the dishwasher. When a load of laundry is done, I put it away immediately, or at the very least separate the clothes to put away at a later time.  Again, I am NOT perfect at this, but I've learned that doing those daunting tasks little by little saves so MUCH time in the long run! Little piles are easier than big ones, that's for sure! We also clean up the kitchen and living room every night before we go to bed. For us, there's just nothing as sweet as waking up to a clean house! 

7. Don't let your stairs or car play you, play your stairs and car. 

Gahhhh, does anyone else have catch all stairs? You know, like that catch all drawer in your kitchen, living room or bathroom? We've really tried to work on keeping our stairs clear. Not only for safety reasons, but so the stairs don't play us! When we go upstairs, we take something upstairs. When we come downstairs, we take something downstairs.  You don't have to do it all at once, but little by little take something up and down each time you go up or down the stairs. It truly saves so MUCH time! 

Alsoooo, anyone else feel like it's such a pain to bring stuff in from the car? Why is that? haha! I am the same way, but since I've been staying home and taking the girls with me everywhere now, I realize how much easier it is for the car to get dirty with two little toddlers.  Every time I come in from the car, I always bring everything in with me now! That includes shopping trip bags, diaper bags, trash, starbucks cups, everything. It is so so nice stepping into a clean car! 

8. Do one minute tasks. Period.  

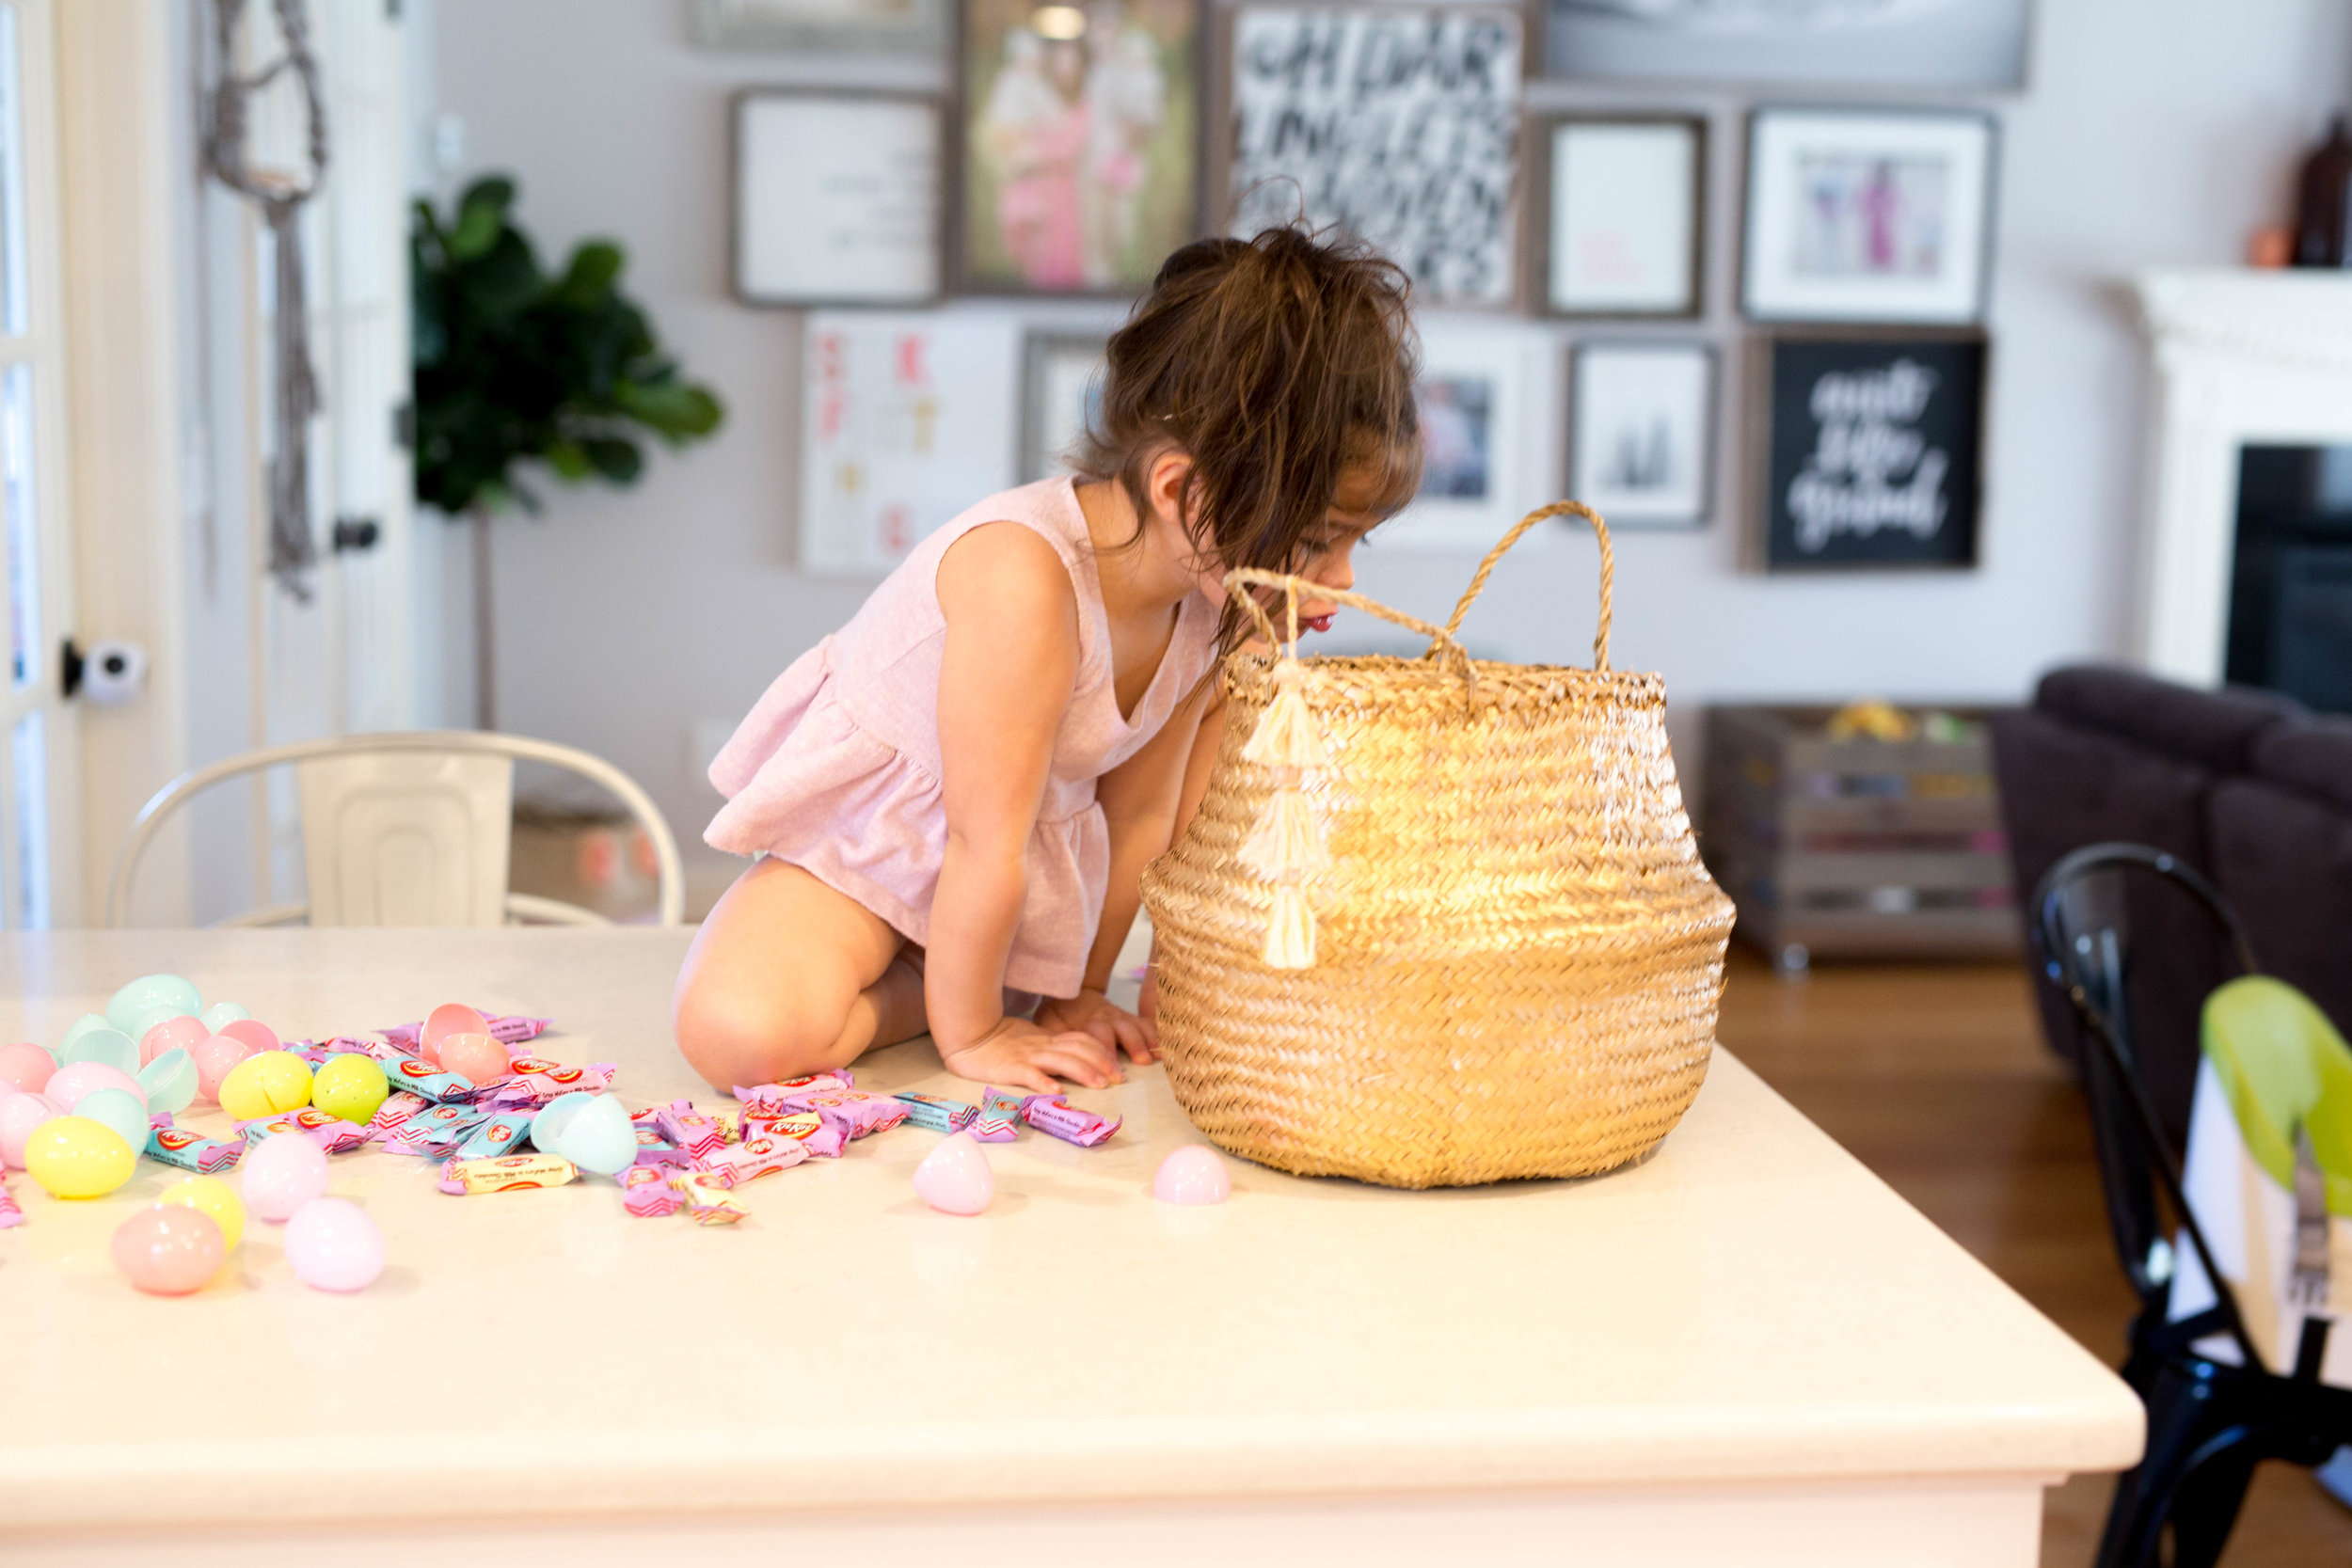
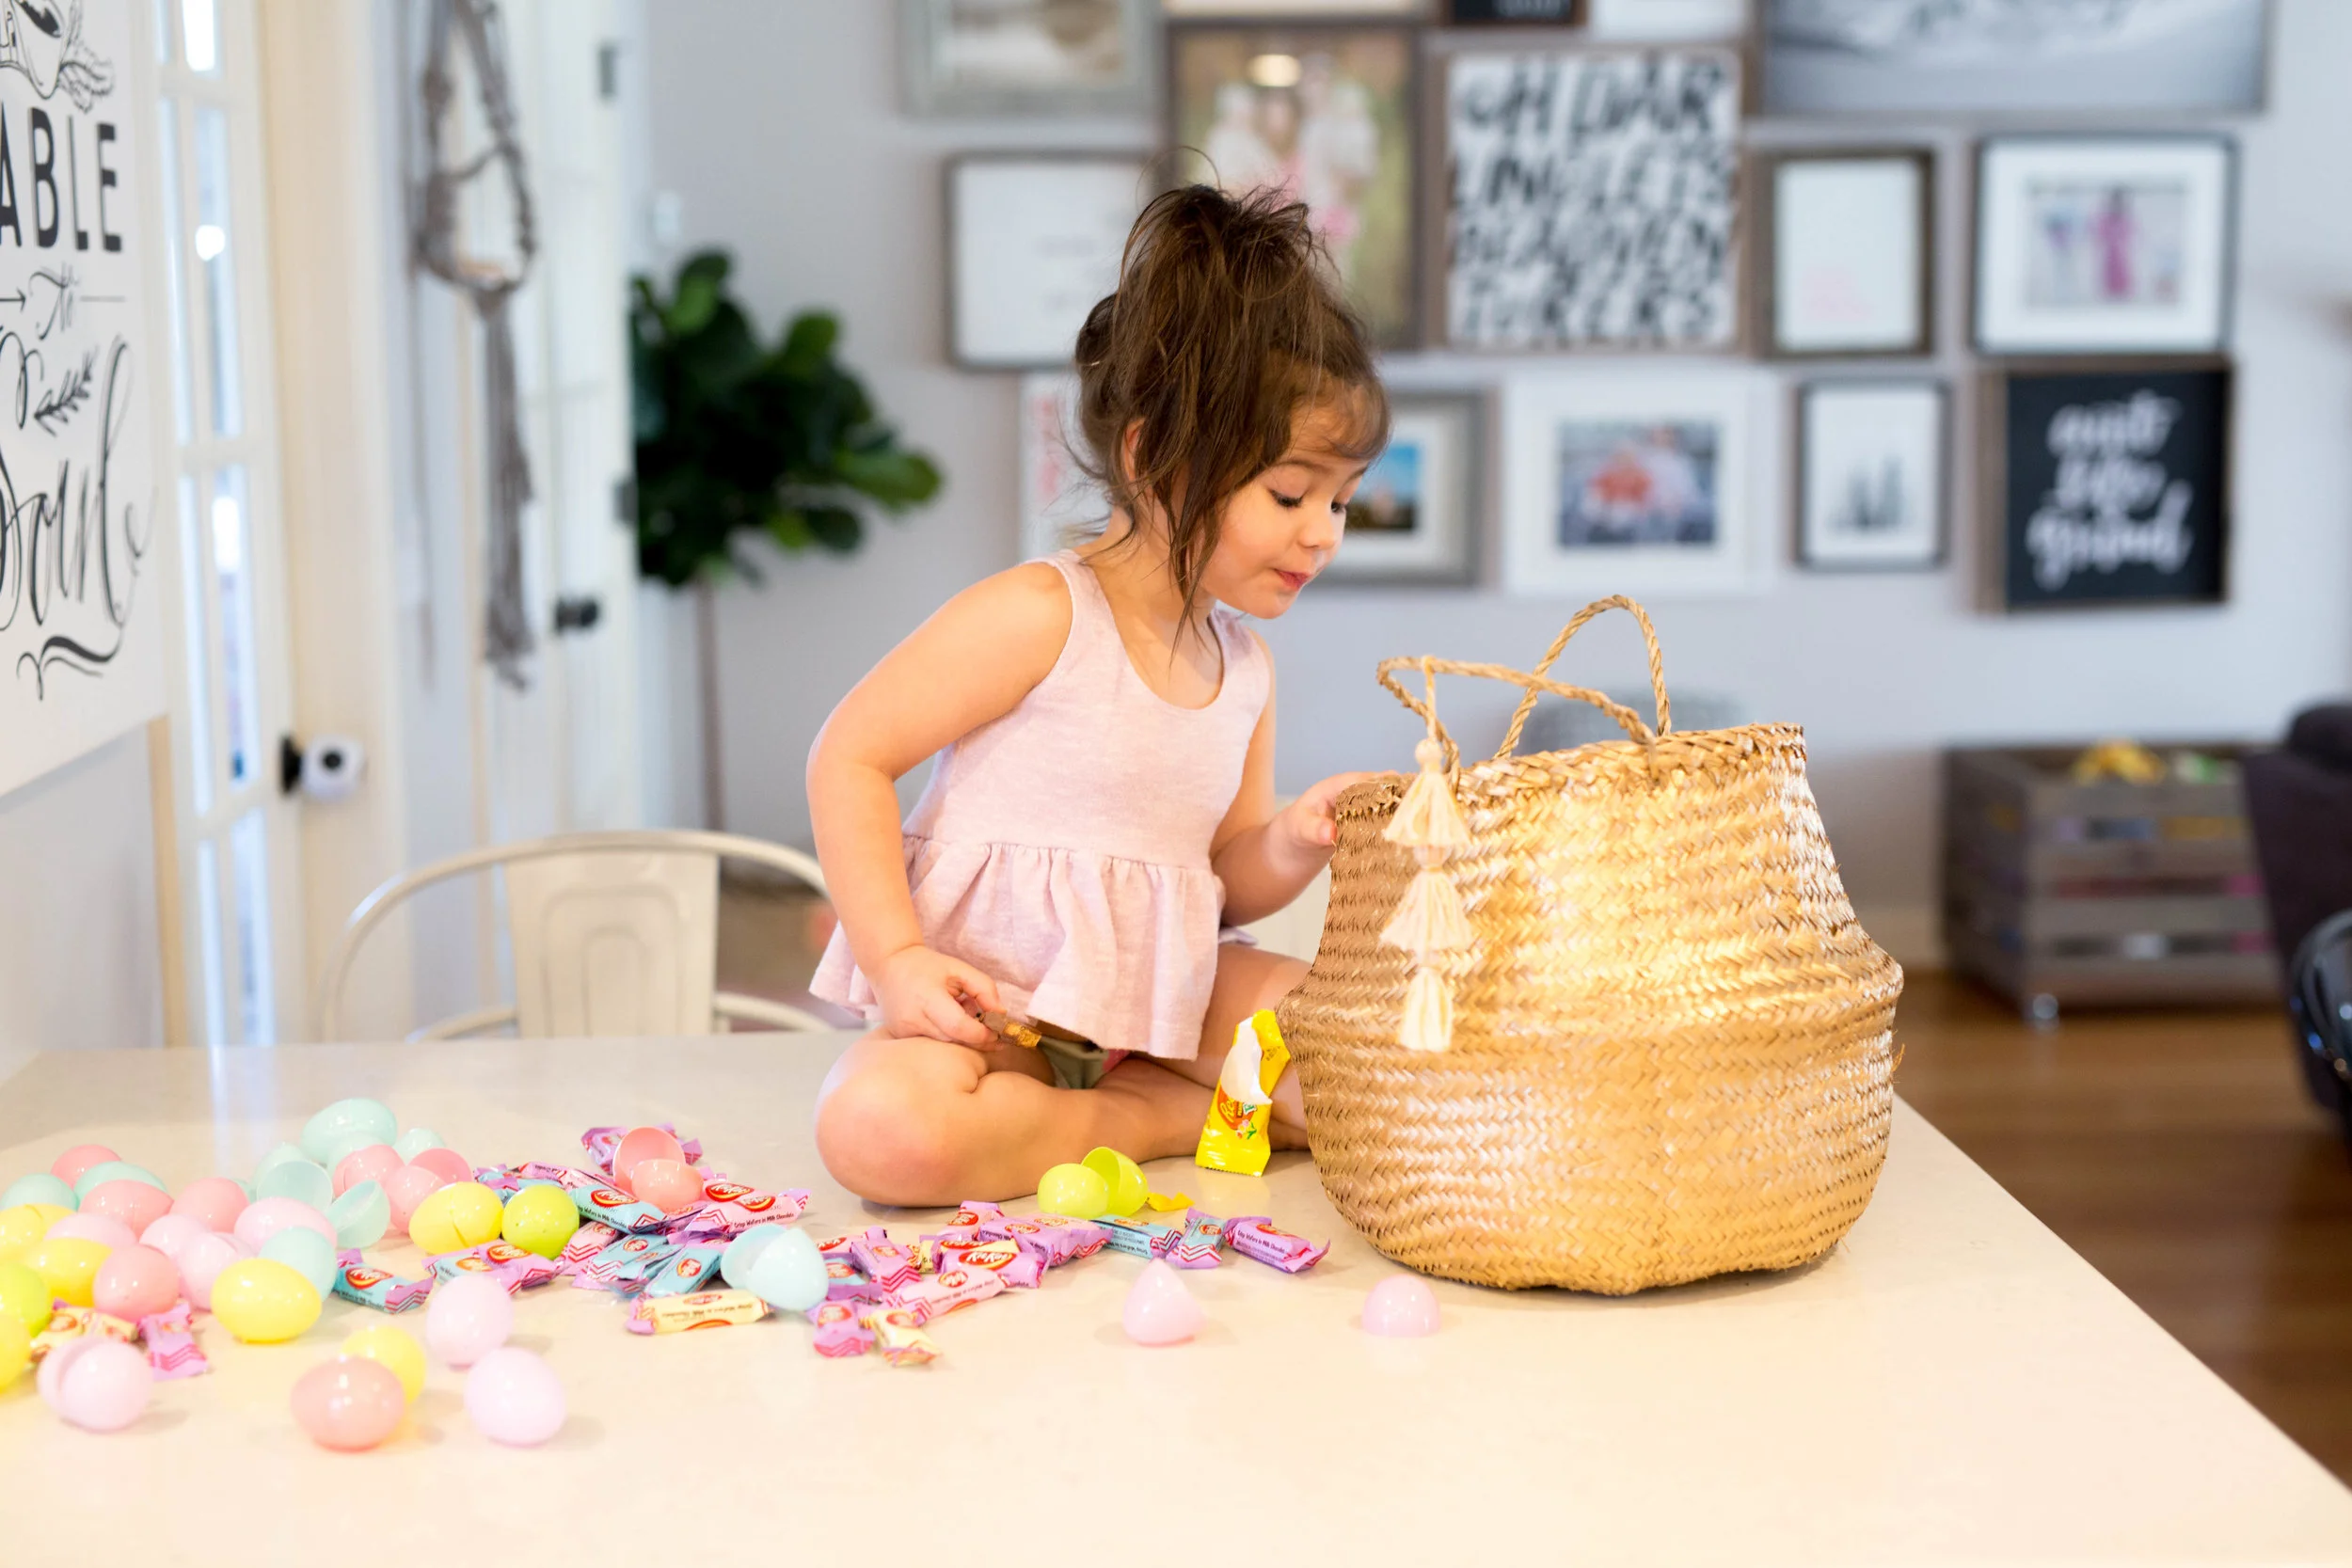
I learned this from my sweet friend Nancy Ray. I think she may have read it in a book somewhere, but regardless, it has been LIFE CHANGING for me!!! If there is something that needs to get done that will only take a minute, DO IT!!! Why is it so hard for us to do those itty bitty tasks?! It is for me anyways.  Now every time I say the words "oh, I'll do that later" I just DO IT. For example, when the girls get up I make them a bowl of cereal, and for whatever reason leave the box of cereal on the counter cause the pantry is just sooooo far away (aka, 5 feet). But now, I put it away because it just takes a second! And man, it feels so good to get those little things done. It only takes a minute, so just do it. Cause if you let 10x 1-minute tasks pile up, then 10 minutes is a lot harder to tackle.   

9. Prioritize your daily tasks list with achievable goals.

Phew, this is probably the hardest thing for me to do. I am a lister through and through. I make lists in my head for EVERYTHING. I mean this blog post is even in a list lol! So for me, making an achievable list is super hard. What I've learned is that just like in making a budget, there's things you want and there's things you need. When you're planning tasks for the day, we have to separate what we want to do vs. what we need to do.  For me, I make my full list i.e. 10 things that I'd like to get done.  Next to 3 of the items, I make a star. Those are the things that MUST get done that day.  That way, if I don't get all 10 things done I still feel accomplished because I was able to do the 3 most important things.  This also means that we have to plan out our days, weeks and months in advance.  If there's a week that looks way too busy, having lists written down will help you move things around to better balance your life.  Making monthly achievable goals is also critical in this step. 

(you can read my "balancing" life blog post here with more on prioritizing)

10. Automate where you can.

Someone once told me TIME IS MONEY. It's so true. We are now more willing to pay others to do things we don't want to do, simply to have more time with our family! There's no shame in that! So, I've been so excited to share how we've automated some aspects of our life!

We just recently started doing grocery pickup which has been AMAZING!!!!! We use Walmart's service and it's been wonderful. On the days that we're out of the house, we plan a grocery pickup on our way home and just scoop up the groceries then! It saves so much time!

You can use a code here to get $10 off your first grocery pickup!

We also automate our diaper deliveries with Honest Company! In 3.5 years, we have never ever once ran out of diapers or baby wipes. It is SO nice to have diapers and wipes delivered straight to our door! 

You can start your monthly subscription here! 

We also do an automatic pest control service! Locally we use Home Team Pest Defense which charges us automatically about $85 a quarter! If you live in an area where there's bugs galore, DO IT! We never have to worry about bugs, and it saves Blake so much time! They send us a text when they're coming out to let us know they'll be in the area, but other than that, they come and go as they please and charge us automatically.  (This could be used for a lawn care service too if that's something that your family doesn't enjoy doing!) 

Lastly, if you're an entrepreneur, automate where able. We're learning this right now, and honestly in the trenches of it. But, it's so important to free up time! 

11. Work out "sitter trade days" with neighbors or friends!

Man oh man oh man has this been an AMAZING thing we've started doing! We are trying to save money where able, given that I am not on active duty anymore, so we've worked out with a few neighbors to do "sitter trade days!" We are all busy in our own ways, and we all need days to just get stuff done without kids! Most times I just go to the coffee shop and work work work while the kiddos are at home with a sitter, and then I in return watch their kids when needed! We try to do three sitter trade days a month! This also allows for the kids to be around other adults as we start to transition to daycare and school over the next couple years! 

12. Find a play place that allows you to work. 

If you can find a play place locally that allows the kids to play and allows you to work, YOU HAVE HIT A JACKPOT! We have a local play gym called "Bravery Kids" and it does just this! I can sit and watch the kids while working on my laptop and it is amazing! I hope your local area has this! 

13. Get a YMCA gym membership. 

Are you wanting to get back in shape but just do NOT have the time to workout at home or at a gym with littles? Well, do you "Y"?! Haha, how corny am I?! Most cities have a YMCA and the memberships are around $30-$60 a month. Roughly. This membership allows you to use all of the amenities.  Most have a swimming pool, sauna, workout equipment and much more and they offer childcare for you! If there's no YMCA, there are many gyms (mostly crossfit) that offer childcare while you workout.  There are also SO MANY mom groups that offer workouts with kiddos! If you google "workout mom groups in my area" you can hopefully find some!  It's a way to get back in shape with the kiddos! Lastly, if all you can do is get outside and go for a walk with those kiddos, then do just that. Most kiddos love walks, and it's just a beautifully healthy thing to do. 

14. Get ready early. 

I always feel like I can get more done when I feel refreshed.  This doesn't mean you have to get glammed up. This means you can just put on gym clothes and throw your hair up.  But whatever you do, just try to wash your face, brush your teeth and change clothes when you get up. 

15. Plan meals ahead of time.

Another one I'm still working on, but I've learned that having a chalkboard in our kitchen hallway that has the meals for the week saves me SO MUCH TIME! I can reference it for the grocery shopping list to make sure I'm not forgetting anything and won't have to make a last minute run for a meal. But it also let's me slowly start prepping stuff on the day of the meal! 

16. Get down with them and get work done.

With your littles that is.  For whatever reason, my kids LOVE when I'm around. haha! jk jk. I know I know. They love their mama! But with that, it can truly be exhausting. I mean really. Hadley is really really in the heat of separation anxiety at 17 months. It's been hard for her to be away from me for even a minute.  But when I get down with her, she's so much calmer.  So I've been working on being more present on the ground at her level, but also getting stuff done. If that means sending a few emails, responding to a few texts or just getting in the quality time that those kiddos need from you, be at their level and watch their spirit change! 

17. Make their breakfast before you go get them. 

Before I go get the girls in the morning, I set out diapers, prep their breakfast and have it all ready.  I've learned that things are just harder to do when the kiddos are around. So being able to do these things by myself allows me to have both hands free (with little screaming) hehe! 

18. Clean at wakeup.

I have LOVED this one so much since I've been home! In our home, our bedrooms get neglected the most.  For me, it's an out of sight out of mind kinda thing. Everyone sees the kitchen and living room, so they get done most! But our bedroom and the girls'? Not so much. So...in the morning, when I go get each of the girls from their room, I stay in there with them for a little and clean their room from the day prior.  I don't even touch it throughout the day, we just clean up together the next morning! They've loved doing this too and it teaches them to help! 

19. Clean the bathroom while giving baths.

Keep in mind, this one is for kiddos that are a little more independent in the tub, but the way our bathroom is setup, I can have perfect sight of the girls (without being too far from them), while they're taking a bath! Our bathroom tends to get neglected too, so it's allowed me to get the girls bathed while also getting the bathroom cleaned! The hubby's LOVED this one. :) 

20. Pack diaper bags and the car the night before.

If you are going somewhere early the next day, or at any time during the day, it is SUCH a time saver to pack bags and the car the night before! I am terrible at forgetting something that the girl's need or that I need to return. If it's something that must go, as soon as you remember it, pack it! You can essentially have everything packed except perishable items and into the car the night before! Anyone with kids knows that it takes an extra 57 hours to leave the house, so anything you can do early is the perfect way to save time...and sanity. :) 

21. Don’t start a next big task until you finish your previous big task.

Example: I *NEED* to watch the next episode of This is Us as soon as the girls go to bed! I’m gonna pour a glass of wine and sit on the couch and relax. BUT, the kitchen needs to be clean because I must wake up to a clean kitchen every single day. So, I don’t get to treat myself to the show until I finish cleaning the kitchen! Same goes for something as simple as coming in to make dinner after grocery shopping with the kids. I won’t start dinner until I go clean out the car with all of their stuff. It’s almost a game I play with myself and allows me to tackle big projects one at a time. We are QUEENS of multitasking, but when they’re major things that need to get done that take time, it’s best to just do them one by one! Another one I do is if I wake up and didn’t clean the kitchen the night prior (which is rare) I tell myself I can’t make coffee until I clean the kitchen. PHEW, you better believe I turn into Nanny Mcphee right that moment! ha!

Something else I love about this one is that it is a PERFECT tool to teach our children! It serves them so well when they get to school, because they learn that they must clean up what they are doing before they can start something else! It’s a very good habit to start young.

22. Clean your kitchen and all of the toys EVERY. SINGLE. NIGHT.

I have started doing this this year, and MAN OH MAN, this is my saving grace! There is truly nothing better to me than waking up to a clean home, and to me the kitchen and the girls toys are always the two messiest things! So after the girls go to bed, Blake and I will clean the kitchen (this includes wiping down counters, doing all dishes, loading or unloading dishwasher and running it if need be, setting out new dishtowels for the next day, and picking up all of the toys around the house). Once you start doing this and making it a routine, then it becomes second nature and it kills you when you wake up to a dirty home! (and then treat yourself to netflix on the couch *reference 21 above).

p.s. the secret to toy cleanup? BASKETS! You can see a lot of our baskets in the #ourhawthornehomeNC hashtag on instagram, and I use them everywhere! I keep toys separated and organized this way and it’s such a good way to teach the girls how to organize items. All their dolls go in one basket, kitchen play food in another, blankets in another and so forth. PLUS they’re so aesthetically pleasing!

23. Get yourself a cordless vacuum.

This one is so important it needed it’s own bullet. Ha!

But you GUYS, seriously…this vacuum that you can find here at my “favorites” blog post is LIFE CHANGING! The fact that I can go grab it at any time to clean up a mess QUICKLY is critical for time saving! I don’t have to worry about cords or bulky vacuums, it’s just the perfect mini life saver. ha! I also loveeee having a bottle of thieves household cleaner on our kitchen counter. I switch out the rag with it every 1-2 days depending on how much it was used. I have this handy to always be able to clean counters, high chairs, tables and what not if there’s a spill and never have to go digging for cleaners. Such a time saver.

24. Clean while you cook.

I am horrible at this. Really. But Blake and I have this agreement that if I cook he cleans the dishes and vice versa. So while I’m cooking, he is taking care of the kiddos and cleaning the dishes that I’m putting in the sink. However, if he’s away for training, I have to do it by myself, so one thing I am really working on is as I finish a pot or mixing bowl or appliance, I clean it right away instead of letting all of the items pile up. Cause then after you make dinner, that full sink of dirty dishes is SO daunting! AMIRIGHT?!

25. Have a weekly and monthly cleaning calendar.

For us, we vacuum all of the carpet floors once a week. We sweep and vacuum our hardwood floors at least every other day. We wipe down all of the counters, door handles, bathroom, sink every day. We do dishwasher runs every day. We run a load of laundry every night. We wash all of our mini kitchen, bathroom and doormats once a week. We wash our family room blankets and pillow covers every 2 weeks. We wash our sheets once a week. We mow our yard and do outdoor work once a week.

Having a calendar that highlights these tasks that MUST get done is game changing. It allows you to get in a routine and routines make habits. When things like this become habitual, you save so much time in the long run.

AND LASTLY...

BONUS TIP: Remember every day is brand new. You set the tone. Joy comes in the morning.

I don't share all these tips and tricks for you to think I have it all together. Honestly, it's quite the opposite. Hence why I'm writing this. For me, writing things down puts them into practice. It's my way of meditating on truth.  So now, let's implement these together and use our time wisely. 

But hey, if the days goes awry quickly and nothing goes as planned...remember...ALWAYS remember, joy comes in the morning. Each day presents you with a fresh start. A new beginning.  Darkness can't stay dark forever.  The sun will always come out again. 

xx, Amy + The Ever Co

TRAVELING TIPS

Updated on October 27th to say this:

Since implementing the tips and suggestions you’ll read about below, I’ve flown with the girls twice by myself and my anxiety is nearly gone! I know that continuous travels this year have helped so much with minimizing my anxiety with traveling, but I also feel so confident that practicing and believing the information below is what’s made the difference!

I also wanted to add this; I think we put so much pressure on ourselves to get it all right (especially when traveling and doing new things). It attributes so much to our anxiety. But what we forget is how resilient our kiddos are. So what(!) if their routine is thrown out the window for a few days. You’re traveling to make memories and to have a great time. So join me in releasing some of the expectations we place on ourselves and our kiddos, and let’s give ourselves lots of grace.

Original post:

I feel as though I'm a seasoned traveler. I love traveling. I love exploring. 

I've driven and flown to nearly every state in the U.S.

I've driven across the country from Alabama to Washington State and back twice. Once was with a two month old in the back seat. 

I drove up to Maine by myself and traveled down the entire East Coast on a "soul searching trip".

I even have the word "wanderlust" tattooed on my side.

Yet, here I am. Two days before flying across the country with my hubby and two littles and I'm kinda FAAAA-REEEAAAAKKKK-INGGGGG OUT! 

If you follow my personal instagram, you know that I struggle with anxiety.

I'm anxious for plane troubles. I'm anxious for the girls not behaving. I'm anxious for the girls not sleeping. I'm anxious for the three hour time change. I'm anxious for the people around us on the plane. Alll...theeee....things.

For me, when I get anxious, the best thing I can do is plan + prepare for what's to come.


FOR PACKING:

1. When packing, go day by day, outfit by outfit. I can't tell you how many times I've forgotten the shoes I needed for an outfit or the slip I needed to go under a dress. This will make sure you don't forget anything! This also makes you pack the least amount of clothes cause you will have specific outfits for each day. 

2. If something's in the wash, make a note to grab it before you go. Speaking from experience there too! Put a few garbage bags into the suitcases so you have somewhere to catch all the dirty clothes throughout the travels too! Bonus if you can wash your clothes before you return back home! It’s so nice coming home with clean clothes to unpack!

3. For kiddos, pack anything and everything you can (but not too much) that reminds them of the comfort of their own bed. i.e. we pack their sound machines and favorite small blanket/stuffed animal if we are flying. If we are driving somewhere, we take more of their things cause we have more room.  They will love having the scent of their home with them on the go! 

4. Do NOT pack big bulky items if you don’t have to!!! We use Baby Quip to rent all of our bigger items upon arrival at wherever we’re going, and let me tell you-it’s amazing!!! We essentially just use a single umbrella stroller for our bigger girl if she’s not walking (and this one is our favorite that we HIGHLY recommend) and then I wear our little girl in my Wildbird wrap! We get off the plane and just get our suitcase and then have car seats, strollers, pack n plays, and all the big items waiting for us at our car rental! Your Baby Quip rep will meet you wherever you want to be met and will even deliver to the hotel or home you’re staying at! I have LOVED my experience with Baby Quip and know you will too! Let me know if you have any questions and you can book your rentals here for future travels! p.s. I always love working out while traveling, so this is my way to rent a Bob double stroller while traveling and to go for a run in a new city! The girls love doing this!


and this is my Lora Double Solid Wildbird sling


5. I always roll our clothes in the suitcase. An army trick we're taught early on. It saves SOOOO much room! 

6. MAKE SURE TO CHECK THE WEATHER! This will let you know if you need to give up some room for a jacket, which is typically what takes a lot of room.

7. I'm realllyyyy bad at packing too many pajamas. I don't know why, but I always feel like I need eight MeeeeeLLLL-YUN pairs of comfy pants. When really, you don't need many pajamas. When you're traveling/on vacation, you've typically got lots of people to see, places to be, and things to do. You'll only put on your comfy clothes at night to sleep in. There's not too much lounging around on the couch watching movies in your jammies all day, so just pack a couple and wear them over again! I promise, I won't judge! 

8. Shoes take up so much room! AM-I-Right? But we want to take alll the pairs! Take shoes that go with multiple outfits! You'll save tons of room! If you're going on a trip that you'll work out and go hiking in, bring shoes that are dual purpose and you can do both in! Also try to wear the heaviest and bulkiest shoes to the airport to save luggage room.

9. Don't forget swimwear and swim necessities! I feel like everyone forgets this. And that's why all those beach shops make so much money! Pack sunscreen, bug spray, swim diapers and all the things you'd have to pay an arm and a leg for at the beach shop! 

FOR THE AIRPORT:

10. Going along with number 6., if you are needing to bring a jacket and it's light enough, make it your airport jacket! Planes can get chilly and it can act as a pillow should you need one! It'll save room in the suitcase too! It’s great as a “blanket” if the kiddos get cold too.

11. Check in early and reserve your seats! BUT, make sure your tickets actually have those seats when you get to your gate! Sometimes they accidentally double book seats! (tip: the back row on most planes are typically the least ideal to book, which makes it the PERFECT room for families! We always end up getting an extra seat open next to us cause nobody booked it!)

12. But, if not, when you get to the gate, beg, plead, do whatever you can to see if there's any rows with open seats! If so, see if you can book those seats and pray that nobody sits there! 

13. Fill up a water bottle at a water fountain to save another eight-MEEL-yun dollars. You won't die, I promise.

14. Referencing #4, we try not to bring car seats or big bulky strollers and instead rent them wherever we are going from Baby Quip. We use our Kolocraft stroller (that’s only $26 and gate check it - it’s cheap so if it gets messed up (which it hasn’t in 5 trips!) then you aren’t losing a ton of money!) I always wear the little one in my Wildbird sling which is so easy and comfy to travel in cause I have free arms to do whatever! IF we do check a stroller or car seat (sneak a few things into those check in bags! There's always tons of room in there and I've thrown shoes or jackets or blankets in them and had no problem! and those are free checked bags!)

15. If you are able to book a flight that's during nap time or nighttime, that may work great for you if you have kiddos that sleep well in new places! Some people get to the airport early to let the kids run around and tire themselves out so they're a bit calmer once they get on the plane. However, my kiddos don’t do well with this, so we actually plan it out to where we only have about 30 minutes prior to boarding our flight by the time we get to the airport. We’ll go to the bathroom, get some food and board last cause I personally want as little time on the airplane as possible. My kiddos can’t nap or sleep on the plane, so this works best for us!

16. Sanitize, sanitize, sanitize. We don't wipe everything down they touch, we just wipe their hands down after the touch everything. :) OH, and ELDEBERRY GUMMIES and thieves essential oils are our lifesavers while traveling for immune support!!! We never leave home without them!

17. Get some food in the airport that they may want on the plane if it's a very long flight. There's nothing worse than hungry babies who don't want the airplane food. I love bringing surprise food of different sorts.

FOR THE AIRPLANE (most tips apply to car rides as well):

18. I personally like getting on last with the kids. If Blake's with me, I'll let him get on first with Everly (our oldest) and all of our luggage to secure the overhead space above our seat, then he gets her seated and settled in.  I wait with the baby until the last minute cause she's the one who will have a hard time sitting still. Some people like to get on first and get settled, but nope-not me. 

19. As far as where you sit, that's a personal preference. Some like to go to the very back cause they feel like they're the least of a disturbance back there. Some (myself) like sitting as close to the front as possible. For me, it's less to walk and quicker to get off at the end. But, I also like sitting next to the engines cause that's the PERFECT white noise! I also always let the kiddos take the window seat. Not only do they always have something to look at but it also keeps them from going into the aisle or accidentaly getting nudged by someone while they're sleeping! (But remember #11 cause the back row typically has free extra seats!)

20. For the first few airplane rides I took with the girls, I gave all those sitting around us ear plugs and a sucker in a little ziploc bag! I’d print a little note off and staple it to each baggy that said "plug your ears if the girls get loud and if they do, remember they’re really just as sweet as this sucker. They’re just new to this!” They always get a kick out of it, and it eased my nerves of flying with little ones! (update: I haven’t done this for our last two trips cause the girls are soooo used to airplane rides now, but it’s great for mamas on their first trips with littles!)

21. Bring headphones for the kids (if they can wear them), otherwise they won't be able to hear their gadgets! We love these from Amazon! 

22. If your baby is nursing, breastfeed at landing and takeoff to help with ear pressure. If they're not nursing or bottle feeding, give them a sucker or some water to sip. The sucking and swallowing will help relieve pressure. 

23. Dollar store and Target dollar spot toys for the win!!! Get a bag with a bunch of dollar toys/fun things that they don't get to see until the plane ride! It will be such a fun treat to see what's in the bag, and they love the surprise! It's a must for us every long trip we take! We get enough to last us for the trip back as well! Right now our favorites are window clings, twistable crayons (so they don't break mid flight), play doh, slime, washi tape, magic coloring markers and shoelaces! We also love Melissa and Doug water wows and reusable stickers! 

24. Same goes for snacks. I hate paying quadruple the price at the airport, so I stock up on little snacks that I know the girls will love. We do mini oreos, mini cheeze-its, plum gummies and all the things they don't necessarily get to eat at home. Yes, they get spoiled on trips! 

25. If your kiddo is potty training or is recently potty trained, DON'T EVEN SWEAT THE PLANE BATHROOM! Just forego the potty training for the trip and stick with pullups! Who wants to mess with a wet seat mid flight, or run to a filthy plane bathroom. They'll get back into undies after the trip. Grace upon grace!

26. Along with the last one, bring garbage bags, ziploc bags and changes of clothes with you at all times. You just NEVER know when an accident will happen. Because hey, accidents do happen.  Put a dryer sheet in the bags just in case it's a stinky and it'll hold in the bad smell a little better! 

27. I spoil the girls with pacifiers on trips too. The big girl doesn't ever get one at home, but the little one does during nap times.  But on trips? Again...we spoil. I need them to be good for my sanity! There's no shame in that friends! 

28. Layer everyone's clothes, including babies, kids and adults! It's so much easier to warm up and cool down in the ever changing plane temps with layers! I also suggest wearing close toe shoes, cause my feet always end up freezing! For the kiddos, put them in shoes that slip on and off easily! Nobody wants to be messing with those difficult shoes on a plane! 

29. Extra baby wipes and hand sanitizer. Let's face it. Airports and airplanes are filled with germs. We always wipe down the arm rests and table tray before the girls touch them. Nothing worse than getting sick while on vacation! We also ALWAYS travel with our oils! So be sure to oil up and take some vitamins before you travel (and during!) These are the elderberry gummies the girls take for immune support.

30. Download Netflix movies to your tablet and computer! It is SO nice having movies downloaded that the kids love that are quickly accessible but also aren't charging you for data!  Here is my ALL TIME FAVORITE tablet case that the girls love! They stand up on their own and also have great handles and come in both boy and girl options!


31. If you have a little baby that likes being worn, after about an hour or two on the plane, get up and walk up and down the aisle. They'll be able to look around, but also (if you're lucky) may get them to fall asleep! Remember the Wildbird!

32. If you have plane anxiety, just pray. Close your eyes and pray. (whether you're a believer or not). Meditate, breathe, relax. You are protected, my friend. I promise. 

FOR THE DESTINATION: 

33. This is where it's great if you have Baby Quip waiting for you at the car rental or passenger pickup area waiting with car seats and a stroller for you! You didn’t have to lug it around, and your personal ones didn’t have to get messed up, yet there’s clean safe rentals right there at your destination! I despise getting somewhere then having to get the carseat and base out and put it into a rental that is brand new to us! We just wanna get to where we're going! That way you can just load everyone up and get going! 

34. As soon as we get to our destination, I immediately start getting our room ready for nighttime. Even if it's morning or midday! I want to let the girls know that this new place is comfortable and that we are going to sleep here, so I start preparing the pack n play and pulling out all of their things from home. This also helps after you're out site seeing and being busy, you get back to a room that's all ready for bed! 

35. If we’re staying at a hotel, we put the pack n play in the closet! One half sticks out and the other half sticks into it where the sound machine is. This not only makes the baby feel like they're in their own room, but it adds so much darkness and calmness around them! 

36. We always always always try to get a suite! When there's two sides to the room, you can make one side the "play side" where the kids can watch tv and play (kinda like a living room at home) but the other side is only for sleep. How hard would it be if your kiddo had to play and sleep and eat and do all the things in their bedroom all day?! Right? We try to take the same approach we have at home into our new space when traveling! This also helps if you have multiple kids and they have different bed times. You can quiet and black out one side and still make some noise on the other side. 

37. Having a suite also allows you to have a kitchen! We always try to get groceries as soon as we get to our destination, cause not only does this allow us to eat healthier but we also get to save money! The girls love being able to eat the same stuff they eat at home too!

AND...

LASTLY, CHARGE EVERYTHING BEFORE YOU GO!!!! PHONES, LAPTOPS, TABLETS, ALL THE THINGS! Don't forget your chargers!!!

WHAT'S EVERYONE ELSE SAYING?

Today I asked my IG community if they had any other tips I hadn't mentioned! Here's what they said! 

FOR THE CAR: 

@bryanalikes says "On road trips it is absolutely necessary for everyone's sanity to plan stops for the kids to get the wiggles out. When traveling from Idaho to California, we like to pre plan the parks and indoor eat and play stops. This way we can say "only 40 minutes til we are at the park!" 

FOR CHECK IN: 

@faithfulmommyhood says "if your airport offers curbside check in through your airline...DO IT! We had a sleeping baby in his car seat, dropped all our checked bags with the airline workers at the ramp then drove our car to its parking spot before walking back to the airport with only our carry on bags and baby! 

FOR A KID WHO DOESN'T LIKE THE PACK N PLAY: 

@nichols.lauren says "a game changer for us was a pack in play mattress. We got the "3 in dream on me" from amazon prime. Our little one hates the pack n play, always sleeps terrible. Since using an actual mattress instead of just that thick glorified cardboard, she sleeps great! 

FOR EXPECTATIONS:

@meghanstone6 says "tips? mainly lower your standards...a lot! haha! but seriously, throw out a ton of expectations and rules. Offer lots of snacks and special activities that they don't normally get. One of the best tips I ever got was to not allow screen time (tv, tablet, etc) for a few days prior to travel. Then when it came time to fly, she's so excited and missed her favorite show!"

FOR LUGGAGE: 

@whitekg says "If there are multiple bags being checked, I spread out everyone's clothes across the bags. So days 1-3 will have outfits for everyone and days 4-6 will have the rest of everyone's clothes.  Rather than each person having their own suitcase. Just in case one goes missing we still have clothes!" 


*****There's a bonus below for sticking with me this long!*****


As a bonus, here's my packing / to do list that I use EVERY TIME we travel! Some trips I don't need it all, and based on where we are going I have to add or delete some items, but I keep this on my phone in my Wunderlist app! I mark things off as I pack them throughout the week prior to leaving! These are in no particular order. 

  • Baby wipes + diapers (don’t forget nighttime diapers!)

  • Camera, camera equipment and tripod

  • Shoes (for all)

  • Coffee (for the on the road) + mug for destination

  • Water bottles (for all)

  • Food in the fridge (to go)

  • Car seats (rent with baby quip)

  • Strollers (one small one for airport and rent a double with baby quip)

  • Dog stuff

  • Book

  • Suitcases (duh-but I'm a lister, so I have to list it)

  • Baby blankets and sleep things (sound machine, bears)

  • Jewelry

  • Swim stuff

  • Jackets

  • Check-In (verify seats)

  • Bags for dirty clothes

  • Take out the trash

  • Turn on Alarm for flight

  • Clothes

  • Do nails

  • Bobby Pins + Hair stuff

  • Purse + Planner + wallet

  • Tablet, Phones, Computers, Chargers

  • Makeup, hygiene bags (for all)

  • Clear out laundry

  • Bottles + Pacis

  • Undergarments

  • Baby Bows

  • Food in Pantry

  • Toys

  • Medicine

  • Hiking Shoes

  • Headphones

  • Gift if needed

  • Baby Wraps (Wildbird)

  • Important documents (passport, id cards, birth certs, etc)

  • Turn off everything in your home (but maybe leave a self timer light on)


I hope you found this useful, friends! 

XX, Amy

EASTER TRADITIONS

Hey there! If you're new around here, let me tell you what I'd want you to know first:

We are a mama and papa bear who love creating traditions for our girls to grow old with. Ones that will transcend generations and make a mark in history for heritage to thrive! 

Today we'd love to share our favorite Easter traditions with you! 


1. BAKING EASTER COOKIES


And here are our cookies! Our favorite recipe is found here! We also cut all of the ingredients in half this batch, cause we knew we'd be getting a ton of sugar from easter egg hunting; just simply divide each ingredient in half to make a half batch! 

Cookie Letters: Home Goods. Snagged them for $3.99!

Plate: Magnolia's Hearth and Hand line from Target (available in select stores)

Rug: Anthropologie (not available anymore)


2. FILLING EGGS FOR HUNTS

We absolutely loved that Everly could actually help with this this year! She even got a special treat out of being such a good helper! 


Snow egg angels are a thing right? Everly seems to think so! 


And there's our stash! 

Basket: From We Are Broots.

Rug: Rugs USA

Everly's top:


3. DYEING EASTER EGGS

One of our all time favorite traditions, that's for sure. Reminds us of pumpkin carving in the fall! But it's also one of the messiest! 


This year we did a fun shaving cream method! We did NOT eat these eggs. This was simply for fun to see what kind of cool colors we could get! If we would've let them sit longer I think we could've gotten more of the tie dye look, but we still loved them! 

Step 1. Fill bowls with shaving cream.

Step 2. Drop 3-5 drops of food coloring in each.

Step 3. Stir.

Step 4. Drop hard boiled eggs in each and swirl around.

Step 5. Let sit as along as you can stand it! 

Step 6. Remove Eggs.

Step 7. Be prepared for your hands to be superrrrr stained. Wear gloves if you can! 

Step 8. To rinse off, use hot water and soap and warm white vinegar. It worked! 


4. EASTER EGG HUNT + SUNDAY SERVICE

Our neighborhood is amazing and each year we hold an annual easter egg hunt for the millions of kiddos that live here! This year I dressed the girls up in cute little outfits and they had on their Sunday best! Here's a pic from the hunt! 


We also love taking the girls to the Easter Sunday service. We know they can't quite understand much yet, but we are so excited for them to learn about the Resurrection and empty tomb! He is ALIVE! 

Skirts: Target.

Baskets: We are Broots and Hobby Lobby.

Headband/Bow: Indy and Pippa.

Shirts:  Stylin Sophie.

Socks: Little Stocking Co.

Shoes: Old Navy. 


5. EASTER BASKETS

There's a blog post on their baskets, which you can read here and find all the details, but here's a few pics of the girls opening their baskets this year! 


6. EASTER SUNDAY BRUNCH

Blake and I are foodies, that's for sure. We started a new tradition last year of having a deviled egg bar and Jalapeño poppers for brunch and it didn't disappoint! They're two of our all time favorite appetizer type foods, but we made enough for it to be a meal! We also love us a good midday iced coffee!

Recipes for all below! 


Deviled Eggs: 

1. Boil Eggs (we have an egg boiling appliance that we got off Amazon that we absolutely LOVE! It makes the perfect hard boiled eggs! 

2. Cut in half and remove yolk.

3. Mix in mayo (or miracle whip) and mustard. Add salt, pepper, paprika and pickle juice to taste and to liking.

Jalapeño Poppers:

1. Clean, cut off ends and gut everything out of the jalapeños. (wear gloves so your hands don't burn)

2. Fill halves with cream chees.

3. Wrap with choice of bacon. We use a maple or apple smoked flavor to make them sweet and spicy!

4. Bake in oven for 30-45 minutes depending on liking at 400 degrees! 

Iced Coffee:

1. Make two shots of espresso. We love our breville! 

2. Add in ice cubes and milk.

3. We also add in caramel drizzle and coldstone creamer to add a little flavor! 


7. OTHER TRADITIONS

We also watched the movie "Hop" as a family and read a ton of books about Jesus over the weekend.  Two things we didn't get to do this year that we'd love to do next year are go see the Easter Bunny and go to a sunrise service on the beach!

Now tell us, do you have any other Easter Traditions that we didn't do? We'd LOVE to know!

XX, Amy + The Ever Co

EASTER BASKET IDEAS


I know, I know...we're about a month late with this post! So sorry!!!

We're finally getting around to our Easter Basket ideas, and we are so excited to share them with our community here! 


We like to follow a rule of fours for our baskets every year! Our biggest tip? Put things into the kiddos' baskets that are practical! We love getting items that we need to buy anyways so we aren't spending money on useless items. Of course, we love spoiling the girls with a couple things we know they'll love, but we try to keep that to a minimum! 

1. Something to read.

2. Something to play with.

3. Something to wear. 

4. Something to eat.


Everly's our oldest (3 yrs. 3 months) and Hadley is our little lady (1 yr. 3 months).

Our second tip? 

Use baskets that won't be stuffed into a closet or thrown away after Easter! We LOVE LOVE LOVE the idea of using storage bins for baskets!!! These bins were found at Ikea for super cheap! $4.99 cheap!!! Do whaaaa?! I then tied little letters to them for each of the girls! I've used those letters for two years now.  We're ALL about reusing things! 


1. Something to read: For E's basket I found this hot pink bunny book at Barnes n Noble A YEAR AGO!!! I was there studying and saw it for $7 in the clearance section! The weirdest thing? THERE'S NO TITLE! haha! I have no idea what it's called, but I've saved it for a whole year to give to her! haha! 

For H's basket I got Bunny Roo, I love you! It's the cutest and most whimsical little book! We love it! 

2. Something to play with: Our favorite toy company hands down is Bannor Toys.  We are so in love with the timeless wooden pieces they create and this little camera is no exception! They're going to love playing pretend with it when mama and daddy are out photographing! 

We also got some new Tubby Todd hair and body wash because they both LOVE to play in the tub! They're big fan of Tubby Todd and so are we! The jelly bean smell is DELISH

We got Hadley to special little pieces: a new slumberkins sloth cause hellloooooo precious little sloth baby! And we got her a new rubber ducky from our favorites Oli and Carol! Both of these shops never disappoint. 

3. Something to wear: This typically ends up being a few items for us because we like getting new pieces during the spring in time for summer and their growing bodies! This year we got the girls the CUTEST clogs and huarache flats from Old Navy for wayyyy cheap! I couldn't believe it, and once I saw how great the review were we couldn't resist! 

We also got our new Jean and June shirts in and our new Indy and Pippa bows! We can't rave about these shirts and bows enough!!! We have some bigggg plans in the works with both of these shops and can't wait to share more in the future, but until then-we're just gonna keep supporting these mamas through and through! 

Lastly, we got the girls new knee high socks for the year from Little Stocking Co and Pip and Willow! They're our favorites for great quality knee highs and tights! 

4. Something to eat: FINALLY we did something a little different this year for this one! Typically we'd do a few eggs with some yummy treat or gummies, but we are going to a big neighborhood easter egg hunt and we're trying to protect their little teeth while we can! So, instead of getting treats or snacks, we got utensils, bowls and plates from the coolest company ever Avanchy!!!! I've tried some other suctioned plates and bowls before, but they just didn't seem to work. But these?!?! These work! I am so happy we got these for the girls and love that they'll get to use them for years and years to come! 

We add in little things like stickers, chalk, bubbles and some little things from the Target Dollar Spot (kinda like stocking stuffers) but this is the majority of what's in their baskets! 

We hope you love them as much as the girls do! ;) 


Ever Co tip: Pin these images to your pinterest for easy reference next year! 

xx, Amy + The Ever Co 

BEGINNER PHOTOGRAPHY TIPS

I am SO excited to host our first official guest blogger! This post is all about photography, but not anything too extravagant-just tips for beginners!

I love pretty feeds on Instagram.  There's just something so magical about a perfectly curated feed that captures my attention, and that's exactly what Kaylee Crane of KayleeCrane.Co did! So we've teamed up to bring you "photography tips for Instagram + beyond for beginners!"


Hey guys! So happy to be here with you today and feeling so flattered that Amy is letting me be apart of one of my favorite blogs! I have been following along with her journey for a little while now and I flipped when I found out that she was pursuing this into a blog & shop!

One of my favorite parts about her brand is all the amazing photos so you can only imagine how I felt when she asked me to share some photography tips with you all! So here I am, I’m no pro, and I have a lot to learn but I’m excited to share the knowledge I do have!

First off, a little back story. I’ve always loved art. Whether it was finger painting as a little girl or making little cards for holidays. Fast forward to high school- I met my husband, Chase, and he was insanely talented with photography and from there it just evolved. I always followed behind him with my amateur camera he let me have and watched every move he made. I would say our styles and types of photography are definitely way different but I learned a lot about capturing stillness from him-which in my opinion is the hardest. We took photos together in the outdoors mostly and every now and again capturing some of our closest friends!


Fast forward again about 8 years and here we are with our first baby, Chester. From the second he was born we’ve barely put a camera down. We share one camera now- a mark iii and I do most of the editing on Lightroom. So lets get to the good stuff! What are some tips for capturing your little family? Check them out below-


1.     My biggest go to is natural light. I’m sure you hear most people with a camera say this but it’s golden. Find the time that your home looks the dreamiest and keep that in mind. Lucky me, that’s first thing in the morning- which is also Chester’s happiest time of the day!

2.     Don’t ever use the approach of “oh I want to get a picture for Instagram or my blog”. At the end of the day, that approach just doesn’t seem to work for me. I just try to capture our family in their element which seems to allow me to get multiple photos to use for multiple reasons- photo books, Instagram Posts, blog posts and so on.

3.     Try to approach a shot by the whole picture not just the focal point. I pay attention to the surroundings because most of the time that somehow makes the picture.

4.     Angles-- get on the ground mama, get those babies crawling straight to you.

5.     Find your style and stick to it. I struggled with this for a while because truthfully, I love all styles. I love those cream-ish photos, moody dark ones, and light airy ones. But I found what works best for us and what I can see us shooting 20 years down the road- consistency is key once you find your groove!

6.     Set the self timer, if you look closely in some of our photos you can see one of us holding our little remote because we can’t master moving it behind us quick enough but you know what? We have family pictures and I love that. If we are traveling and it would be risky to put our camera up on a tripod we will just ask a stranger to snap one- most are intimidated but get your settings where you want them and tell them to put the little box on one of your faces! VOILA!

7.     Editing tips- for me, I love to lighten up the photo by adjusting the brightness and also adding some more contrast. It gets the colors exactly where I want them. My go to filters are by VSCO or Filmborn (Matins Labs). Either way, even once I add a filter I always knock it way down and still have to play with the settings. Make it yours!!

8.     I often get asked how I get my husband to take photos of my family and also be apart of them. Truth is, he obviously has always loved it. But again don’t approach it with tip # 2 or else you all are going to get into a frenzy and that’s no fun for anyone and your husband will never want to do it again!

9.     Grab other cameras- I love shooting with my iPhone and especially our insta film camera! Some of my favorite memories are on those Polaroid’s.

10. Lastly, ENJOY IT! I often hear moms saying it’s so stressful getting photos of their kids or families – embrace those grainy, blurry, and crazy shots. Those are the ones that hold the best memories. Un-staged, showing your phase of life, and ABSOLUTELY PERFECT!

I hope these little tips can bring some help to your own photography! If I didn’t answer one of the questions you were hoping to hear more about- leave it in the comments!

Thanks for letting me share with you guys today!


I mean seriously guys! How stinkin precious are Kaylee and her family! These tips are so simple but so important, and we couldn't agree with them more! What I love even more is that Kaylee's family truly does embody The Ever Co spirit.  They love celebrating holidays, creating traditions and capturing memories that will last forEVER! Take a look around her blog, but be sure to check out the cutest pumpkin carving party here.  Here's some pics from their family time to show you just how precious they are! 

Thanks again for joining us Kaylee! We are so grateful for you! 


xx, Amy

BALLOON ARCH DIY TUTORIAL

The wait is over! My most asked for tutorial is finally here!!! Yippee!!! 

 
balloon garland tutorial copy.jpg
 

It's no lie that I have such a passion for celebrating people, and there's no better way for me to do it than create a backdrop and beautiful scene for their celebrations! 

I'll be sharing pictures from both Hadley's first birthday party and from a recent baby shower I hosted! I love that you can see two different color scheme options, but I also love showing you this because the exact same DIY method was used for both!!

Can't wait to see your creations!


STEP ONE: GATHER MATERIALS

  • greenery (i used eucalyptus leaves and silk flowers from Hobby Lobby)
  • staple gun (we used a staple gun because we are redoing the wall that I've been using for these arch garlands. We've also used heavy duty painters tape as well, but it's not guaranteed to stay up.)
  • balloons (I gather balloons from various big box locations like party city, walmart, target, hobby lobby, michaels and joanns, but I also love shop sweet lulu and etsy shops for more specialized colors!!)
  • washi tape (to cover the ends of the floral wire)
  • cloth floral stem wire (buy the heaviest gauge available and around 18" for length.  There are Hobby lobby, walmart and amazon versions available! Just google search "cloth floral stem wire" and many come up; I bought ours at our local Hobby Lobby)

STEP TWO: COVER FLORAL WIRE ENDS

  • for this step you will use your washi tape to cover the floral wire stems.  cover the ends of all the floral wires you plan on using. the length and number of wires will be based on the size of arch you need (get this measurement by laying them out along the wall to get a visual for how large you want the arch).
  • the purpose of this is to ensure that as you're messing with the wire (which is sharp) it doesn't accidentally poke and pop one of the balloons; it equally acts as a barrier for your skin too! 

STEP THREE: BEGIN TO TIE BALLOONS TO THE WIRE

  • you want to first use your limited colors.  If you are using a pink, red and white color scheme for instance, but you want pink to be the dominant color, I'd start with placing limited reds and white along all of the floral wires spreading them out evenly. then I'd go back in and fill in all the open areas with all the pinks remaining so that there's mostly pink in the arch.  similar to the blue and gold arch, I started with the gold first and then filled in with all of the blue. 
  • to tie the balloons to the wire, I didn't tie them off to themselves first. It's easier to tie them to the wire as you're tying the balloon off.  Does that make sense? haha! 

STEP FOUR: FILL IN ALL SPACES

  • add in all of the filler balloons (the dominant color) and lay the arch flat on the ground to make sure there's no open areas.
  • also remember that once it is on the wall, many of the open areas will fill in because the pressure against the wall will push the balloons out.  

STEP FIVE: STAPLE WIRE TO WALL

  • again, you may want to use another method that is a little less damaging to your walls. we are only doing it because it's a wall we are going to redo. BUT, if you can do it-do it! It's the best way to keep them secure! if you have a space that can be easily covered up by a large picture, then a staple gun will work!! 
  • you want to staple right above where you put the washi tape. 
  • once the wire is stapled to the wall, the best way to secure the wire is to wrap the end with the washi tape around the wire to fully secure the arch to the wall! that'll keep it from slipping or sliding at all! 
  • repeat this step with each end of each wire to form an arch on the wall.
  • we learned that it's best to do each piece in segments because it's much easier to work with the smaller sections. once you put them all together on the wall it'll look like one fluid piece! 

 STEP SIX: ADD FLORAL

  • once the full arch is on the wall, add in all of your pretty greenery and floral to make the arch come together! THIS IS MY FAVORITE PART!!! IT ADDS SOOOO MUCH! 
  • you'll have to mess around with different angles and placements until it looks the best, but feel free to use my pictures as inspiration for where you should place yours! I also use flowers and just stick them in between balloons to hold them in place! 
  • if the balloons are secured to the wall well (i.e. with a staple gun) you don't have to attach the flowers or greenery into the wall at all! mine are all just placed in between the balloons which hold them on the wall just fine! 

I canNOT wait to see what you all come up with! Be sure to tag us @theeverco and #theeverco so we can see and possibly feature it on the blog or IG!

Here's some pics from my instagram @amylouhawthorne from the two parties I made these for! I'm pretty sure they're my all time favorite DIY now! 


xx, Amy

VALENTINE'S MOVIE DATE NIGHT IDEAS

We are HUGEEEEE movie buffs.

When people ask what Blake and I miss most about life before kids, the answer is always GOING TO SEE MOVIES!!!

But we've also learned that movie date nights-in are just as fun! We can't wait until the girls are old enough to go to the theater, but until then-we are soaking up this time at home! There's nothing more we love than to all curl up on the couch with popcorn, blankets and our coziest pajamas and play Star Wars, The Land Before Time or Planet Earth. We're nerds, I know!!! 

During the week of Valentines, we always make an effort to watch the cute, sappy stuff (which pretty much means: hellooooooooo chick flicks + Disney movies allllll weeekkkkk longgggg) The best! 

Get ready to swoon over this daddy + daughter duo. (insert heart eye emoji here!) 

You can shop their matching shirts here (daddys) and here (babies)


And then our little ham and her pup, eating all the popcorn she can get her hands on! 


We've rounded up our all time favorite family friendly Valentine's movies that are great for kids and also our all time favorite romantic dramas/comedies for you and yours!!!

We hope you take the time to relax, sip some wine or coffee and watch movies that spread joy, hope and love this Valentines!

And yes, make it a tradition. You'd make us so so proud. 


For you + your love 

valentines movies adults copy.jpg
 

happy movie night!

xx, Amy

SPEAKING THEIR LOVE LANGUAGE

This Valentines I've chosen to give more with less.


I'm a gift giver naturally, it's how I most comfortably show my love language.  But I've realized that not everyone feels loved the most in receiving gifts. And that's a hard concept to grasp! Our love languages aren't all the same, which is totally fine, but it can be a difficult concept for couples to figure out when we feel like we're desperately showing love and it's not being received. 

It's not only important to learn how you show love best, but it's equally as important to learn how your significant other receives love the best! Luckily, Blake and I have figured this out pretty well over the years and I know that while he may not need tangible gifts to feel loved, there's one tangible gift that goes straight to his heart.

And tummy. :) 


Food and sweets are the way to my man's heart. He got that sweet tooth from his momma. :) And while I may not be the best in the kitchen, I've learned so much from my mom and his mom over the years with recipes that they've handed down, and now I've become a self proclaimed chef! Now, I get lost in the kitchen (both literally and figuratively, ha!) but it's because I know just how much a good home cooked meal means to him. It's because I know baked goods speak straight to his soul.  His eyes light up at the smell of homemade apple crisp.  His smile widens at the sight of homemade cream cheese icing for his cookies.  He's such a foodie, so I've learned to show him love this way. 


You may have seen that I am transitioning out of Active Duty Army service to the Army Reserves this summer.  And with that comes a huge pay cut - a $6,000 one to be exact.  We've been revamping our budget over the last year, and have learned that happiness isn't found in our bank account. I've been learning that I don't need all the things all the time, and have mastered the fill the cart up but put it all back at the checkout line with one final pep talk with myself. (the cashiers hate me haha!)

So for the last year I've been strategically and diligently living with less, needing less, buying less and giving less.  Which honestly is super hard for me, because it's naturally what I love to do.  But I've realized that the decisions I make with our money now are going to have lasting impacts on our future. In the last year, we've realized the truth behind one cliche phrase after another.

 Money can't buy our happiness, but our memories can.

Hence, why we created The Ever Co. 


Writing is a lost art, and it's an art that my sweet daddy did such a beautiful job of teaching me.  I never want to lose the passion I have for writing, and I'm passionate about instilling the art of writing in our girls.  A handwritten note goes a long way. 

For Valentines I created these "I love you Most" printables (found here) for him.  All week long I'll bake tons of yummy goodies for him to come home to after work.  With each yummy surprise there'll be a card, and on the back a note that reminds him why I love him more.  A note that reminds him all the reasons that I fell in love with him in the first place. I've printed off a ton of these and have hid them all throughout the house for him to find throughout the week of Valentines, but also even long after! Cause I know just how much a note of love means when it's least expected.  There's something so special about the subtle surprise of words that pull on heartstrings. 

And now, I think we have a new Valentine's tradition. 


We're learning to live a more abundant life with less in our bank account. 

So we challenge you this Valentines (and for holidays after) to not necessarily go out and buy all the things, but to make something-create something-go somewhere, to do something that creates a tradition and that makes lasting memories for you and yours truly.  Sure they'll remember the coolest techy gadget, but will they remember a trip to the place your first met and a picnic even more? 

We challenge you to do things that have tons of meaning and make tons of memory.

I have a good feeling it'll be just as special. (your bank account will thank you too) ;)


With the printables purchase from our shop, you get all three of these designs for just $2.99 to print as many as you'd like at home or at an office store! We want to bring you affordable, modern + hip designs in all that we create! We guarantee you can't find these at Target. ;) 


Printables- you can find the printables here for just $2.99 in our shop! 

Our cookie cutters were found at Home Goods for just $3.99, but here's similar ones from Target for $8.99! 

Here's my all time favorite rolled sugar cookie recipe! 

Ingredients:

  • 1 1/2 cups softened butter
  • 2 cups white sugar (I use 1 1/4 cup and we still love them!) 
  • 4 eggs
  • 1 tsp vanilla extract
  • 5 cups flour
  • 2 tspns baking powder
  • 1 tsp salt

Directions:

  • In a large bowl, cream together butter and sugar until smooth. Beat in eggs and vanilla. Stir in the flour, baking powder, and salt. Cover, and chill dough for at least one hour (or overnight).
  • Preheat oven to 400 degrees F (200 degrees C). Roll out dough on floured surface 1/4 to 1/2 inch thick. Cut into shapes with any cookie cutter. Place cookies 1 inch apart on ungreased cookie sheets.
  • Bake 6 to 8 minutes in preheated oven. Cool completely.

Here's my all time favorite cream cheese frosting!

Ingredients:

  • 1/2 cup softened butter
  • 8 oz. cream cheese
  • 4 cups confectioners' sugar
  • 2 tsps vanilla extract

Directions: 

  • Beat softened butter and cream cheese until well blended.
  • Add powdered sugar and vanilla. Beat until creamy.

Happy baking and note writing, loves!

xx, Amy

Redefining Profit

Owning your own business typically brings one common theme to mind: money. 

So understandably, when you're making a lot of it-it's generally thought that the business is boomin'. And conversely, if you're not, it's generally thought to be hanging on for dear life.  

But I want to throw a concept out that may come as a surprise to some: what if starting, owning and running a "for profit" business wasn't all about the money? What if the dollar signs in our bank accounts weren't our success stories?  We can be the wealthiest business owners, but completely lose our passion and drive in an instant if we aren't careful. And not everyone will agree, but for us-money can't buy our genuine happiness. 

There's so much more. And we choose heart over hustle. 

Profit: to obtain a financial advantage or benefit, especially from an investment.

What if we shifted our culture away from thinking the word profit was directly tied to a financial advantage, and instead that it was tied to a benefit? What if our "profit" was whether or not we were serving the people we are running the business for? What if our "profit" was whether or not our purpose and mission are being fulfilled? Now, don't get me wrong-we want to put a roof over our head, we want to put food on our table and we want to build a happy and healthy upbringing for our girls, but the dollar signs that show up on our monthly financial statement don't define us. 

WE WON'T LET THEM DEFINE US.

What will define us is if we are serving "The Who" and "The Why" of The Ever Co?

The Who: It's about you. Our people. Our tribe. Our community.

The Why: It's about our mission. Our purpose. Our calling. Our legacy. 

We, as small business owners, must get back to the heart over the hustle. 

I think so often as entrepreneurs and creatives, we focus on the what, where and when of our business endeavors instead of the who and the why.  And THAT is what burns us out. We get so wrapped around the logistics of growing our following, of making more money, of getting bigger and better and having more, instead of worrying about how we can serve YOU better and how we can serve our purpose more.  It takes the fun out of small business, and I never EVER want us to get there.  I hear so many stories of entrepreneurs getting burnt out, and we don't want that.  We are in the infancy of Ever Co, and we are setting our priorities on people + passion over financial profit.  

When we take out the unnecessary logistics and marketing pressure of entrepreneurship and instead focus on our passion and purpose, joy fills our office space.  It reminds us that we are serving our given "market" for a reason.  That is, in fact, what initially sparked your interest, right? You saw a gap or a need that you wanted to fulfill.  But here's the kicker: If we are serving our audience well, and if we are serving our purpose well, then the financial profit will come. I truly believe that refocusing our energy on our people and our passion will allow us to grow financially.  But, our priorities must be right for that to happen.  

 We never started our business to get rich. Let's face it; we entered a saturated t-shirt market and threw a cute graphic and our brand on a piece of cloth. Spoiler alert: you probably won't be seeing us on Shark Tank for this! But, we also aren't "just another t-shirt company." It's so much more than that for us.  Just as much as we are a brand, we are also just as much a community.  A community to inspire you to celebrate holidays with those you love most.  A community to inspire you to create traditions right where you are. At home, at work, in your backyard, at your favorite restaurant. Wherever your feet are planted.  A community to inspire you to capture memories that will last forever.

The deeper we get with growing our business, the more I realize how much this same concept applies to my own social media platform @amylouhawthorne.  

I spent five years growing the following I now have.  Yet, for the last year-I've continued to watch the number next to my name go down by the hundreds every single week.  What was once so easy to grow has now become a nightmare for many social media bloggers-especially on Instagram.  The algorithms for platform growth continue to change on the reg, which makes it extremely difficult for bloggers to grow their community. We're competing with actual coded in algorithms that hide our content from our long time followers, and that's just plain discouraging.  To be honest, for most of us it's INCREDIBLY stressful.  I'm in a ton of small pod groups and we talk about it daily. "What do we do?" "What do we not do?" "What did we do wrong?" And it puts SO much pressure on us, as if our lives don't already give us enough! 

But this week something in me shifted.  (Hence this blog post) I got rid of my business profile, and I switched back to a personal profile. I now can't look at the statistics of everything I post.  I now can't watch the numbers fluctuate up and down on my account.  I now can't see how many people my posts are reaching.

Instead, now I'm focused on you.  I'm focused on why I share and who I share for.  

Cause here's the scoop friends:

I get messages every week that say "thank you for saving my marriage." "Thank you for giving my marriage hope and promise for tomorrow." "Thank you for being vulnerable in your own failures to remind me that nobody's perfect." 

I get messages every week that say "you reminded me that I don't have to give up on life when things get rough. You reminded me that putting this knife to my wrist or gun to my head wasn't the answer." 

I get messages every week that say "you lead me to find Christ." "You saved me from a life of destruction by teaching me about our God who loves us so."

I get messages every week that say "my kid doesn't measure up in the eyes of the world either, but you reminded me that they are all unique and beautiful in their own ways. Just as they were chosen for us, we were chosen for them." 

And friends, THIS is why I do this.  Because if I can save one young couple from signing divorce papers and giving up, if I can stop one person from slitting their wrist and ending their life, if I can lead one brother or sister to the goodness of Christ Jesus our Lord, if I can remind one mama that their child's diagnosis doesn't define them as a parent, then that's all that matters.  And that's what I want my legacy to be.

When the day comes that I leave this world earth side to be reunited with my daddy, I want to be remembered for creating a legacy and building a heritage for my daughters to live on and live in.  I want them to be proud to call me mama. I want my husband to be proud to call me his wife.  I want my parents to be proud to call me their daughter.  I want my Soldiers to be proud to call me their leader. I want our Ever Co community to be proud to call me a friend. 

We truly truly love you so. 

xx, Amy

p.s. pin this image below on pinterest or share it on social media to spread the word! We want to change the culture in small business. Help us get back to the heart over the hustle. Help us redefine profit. 

Redifining Profit copy.jpg

Bonus: A few notes about our business plan! 

We just packaged our 500th shirt and shipped our 400th package in just over a month of sales, but we are just about breaking even financially with what we invested into our website with Go Live HQ, our family video with Heart Stone Films and our inventory.  For our business, we wanted a no shipping + no extra fees model and we also wanted to create affordable shirts for your families to wear.  With that, our margins are not through the roof, and we are okay with that! Mark Cubin may be disappointed, but he'll get over it. ;) We love going to check out from a shop and seeing the words "Free Shipping" pop up, so we wanted to implement that in our shop too! 

DIY FLOWER CROWS

The picture that broke the internet. 

Just kidding.

Just a really cute pic I found on pinterest while spending an hour trying to find the perfect pic to announce this blog post tonight. So, I found a cow. And it may very well be my favorite picture of all time. But now to find this cow's owner and give credit where credit is due! If you find the source, let me know!

So here we are! I've been so excited to share this blog post on DIY flower crowns! Throwing a crown party is not only the BEST idea for a GAL-entines bash, but it's also such a perfect activity for a bridal shower, baby shower or other all ladies gathering! The whimsical, bohemian feel of them just makes my heart melt.  

Here are a few of my favorites (with tutorials) that I found today while spending 89,722 minutes trying to find the flower cow owner! ;)

This adorable one from Maker's Society! 

This gorgeous one from Delia Creates! 

This precious one + Rock My Wedding! 

Screen Shot 2018-01-21 at 9.30.51 PM.png

This darling one from Little Inspiration Blog! 

But wait, there's more! 

I am so excited to introduce you all to Marrissa and Amanda of The Wild Revival! 

We truly wanted to find blog contributors who shared the same passions as The Ever Co.  We wanted genuine souls who were on fire to build legacy and create tradition. 

And that's exactly what we found in these two ladies. 

The Wild Revival -21.jpg

Here's a small exerpt from their blog post on their DIY Flower Crown Gathering!         

"The heart + soul behind The Wild Revival Gatherings is creating a space where the walls can drop and real, honest conversations can happen.

This is about connection.

On the last Saturday of August, we finally held our first gathering: Flower Crowns + Food! It was amazing to see our heart’s desire come to fruition right in front of us.  It was an ideal end of summer soiree.

There were 16 of us at the event and we each brought something different to the table. Our stories are different, as are our struggles + our joys. We created, we laughed, and we engaged in conversations we wouldn’t have had, had it not been for the gathering. There is something to be said about what God does when He brings people together in that way."

“The heart of hospitality is about creating space for someone to feel seen and heard and loved. It’s about declaring your table a safe zone, a place of warmth and nourishment.” 

― Shauna NiequistBread & Wine

blogger-image-181247789.jpg

Honestly, I could not be more grateful that The Wild Revival are our very first EVER blog contributors.  I'm so grateful to be surrounded by women who encourage and uplift other women. Who cheer each other on. Who lift each other up. Who inspire.  

Thank you ladies so much for sharing your hearts with us and for GATHERING! 

Be sure to share your flower crowns with us on Instagram and tag us @theeverco ! 

Matthew 18:20 "For where two or three have gathered together in My name, I am there in their midst." PC: pinterest, source unknown

Happy crafting!

xx, Amy

FINDING BALANCE

Busy day? check.

Not enough hours in the day? check.

Feel like your priorities are all mixed up? check.

Then this one's for you.

Up until recently, I told myself "I just want ten more hours in the day. Only then could I get everything done that I need to!" But the truth is, we would likely still manage our time exactly the same as we habitually do now with even more hours in the day.  We'd still find every excuse in the book to skip out on those things that matter most.  We, as a society, are collectively on the struggle bus when it comes to managing our priorities.  And friend, that's okay. Cause managing priorities and finding balance are hard work. But let me share this with you-a quote that changed my life by Laura Vanderkam:

 "You have fewer than one thousand Saturdays with each child in your care before he or she is grown up." Wait, just one thousand?!? That's like tomorrow! 

Phew, grab me the tissue box. That was all that I needed to hear to take action and get my priorities in check. To find my balance. 

We must shut out the not-so-important and reel in the real-important. 

It's not so much what we prioritize, but more importantly how we balance the priorities we've set. 

My Army Chaplain told me something in December of 2012 that's never left my rolodex of favorite quotes since: "You can't have two number one priorities. If your priorities aren't in order, and if you aren't managing them individually, then your number five will trump your number one and your number two will collide with your number three. Priorities are priorities for a reason. We must manage them as such." 

I was the girl who pulled all nighters EVERY SINGLE TEST in college because I put off studying until the last minute.  I was the young woman who let debt pile up so high that my credit was shot and I thought I was doomed for life.  I was the wife who cared so much more about what others thought about me than my own husband. 

Until I started focusing on balance. Until I started realizing that I HAD to set priorities and take actions to tend to those priorities every single day. It was only then that I graduated with honors, came out of nearly $100,000 of debt and saved my marriage. 

If something is worthy of being a priority in your life, then it is worthy of being tended to.

I call this "tending to": filling up the priority's bucket.  

Think of your priorities like they are buckets.  When you make something a priority, you are consciously telling yourself that this subject is SO important to me that I must take care of it. I must keep it filled with water to survive.  Now don't get me wrong, different seasons of life may call for different amounts of water, but nevertheless-if it's a priority, it needs water. The more priorities you add, the more water you need to spread amongst all of your buckets. Imagine your water is time, energy, love, care, compassion, money, attention, desire, discipline and focus. We likely don't have enough of this to share evenly amongst all of our priority buckets, right? And even if we think we do, we're likely sacrificing in one for another, rather than consciously tending to each bucket alone. 

And this is where we learn to balance. 

I'm so often asked how in the world I manage all of the things that I do. I'm a Christian, always seeking after more truth. I'm a wife, yearning to love my husband more. I'm a mom, desperately wanting to be more present for my girls. I'm an Active Duty Army Officer, ready to accomplish every mission assigned to me with initiative. I'm an entrepreneur, eager to grow and learn and give back. I'm a 31 year old woman, chasing after health and fitness goals postpartum. And, I'm currently in a season of grief-holding on to hope for a better tomorrow. This is me right now. Learning to balance these priorities I've set.

Not necessarily learning what buckets can be less filled than others.  Rather, learning how to fill my buckets with the amount of water they need to survive. 

Here is how I balance my priorities. 


The decisions we make and actions we take must consciously meet the needs of our priorities every day.  We must fill up the buckets for the most critical aspects of our lives so they don't run dry.  When certain buckets have more water than others, balance will be lost. We must fill our priority buckets up every day with the amount of water they need to survive. However little. However grand. Give them what they need. 

I encourage you to read "What the Most Successful People Do Before Breakfast" by Laura Vanderkam. I've learned so many useful tips and tricks to apply to this very subject.  Since reading the book, I've become completely enthralled with the idea of waking up early.  Now, mind you, I'm very used to it having been in the Army for seven years.  But now, it's not a dreaded alarm clock.  Instead, I'm anxious for my alarm to go off at 5 a.m. every morning to start my day reading the Bible and filling my soul with the spiritual fuel needed to survive.  On Mondays, Wednesdays, Fridays and Saturdays I go on long runs to train for my marathons.  On Saturday mornings, we get a sitter and Blake joins me so we have 10-15 miles to be together-just us. We go get coffee + breakfast afterwards and just chat.  Already, before 8 or 9 a.m. I've tended to three of my priorities. Faith, Family and Fitness.  Bottom line: make the most of your mornings. Don't waste that precious time. 

Some notes from the book: 

  • Successful people have priorities they want to tackle, or things they like to do with their lives, and early mornings are the time when they have the most control of their schedules.
  • If you wait until the end of the day to do meaningful but not urgent things like exercise, pray, read, ponder how to advance your career or grow your organization, or truly give your family your best, it probably won't happen. If it HAS to happen, then it HAS to happen first.
  • In the morning, after a decent night's sleep, the supply of willpower is fresh. Getting things down to routines and habits takes willpower at first, but in the long run conserves willpower.
  • Successful people turn high-value tasks into morning rituals, conserving their energy for later battles. 
  • The best morning rituals are activities that don't have to happen and certainly don't have to happen at a specific hour. These are activities that require internal motivation. 
  • The best morning rituals are activities that, when practiced regularly, result in long-term benefits. 

TAKE ACTION: 

1. I would absolutely love for you to grab this free printable and create your own balance sheet like mine! Upload it to instagram and share with us! 

2. Start paying attention to how you use your time. There's a spreadsheet you can download here from Laura Vanderkam. 

3. Plan out your weekends for six months! Sound crazy, huh? Create a bucket list with your family or closest friends that gives you things to do, people to see and places to be! You wouldn't believe how much time it saves when you actually plan out your weekends! And how fun is it to make a bucket list.  These don't have to be expensive activities, but make them unique and special. Mostly-live The Ever Co spirit and make MEMORIES that will last forEVER! 

Follow me @amylouhawthorne and @theeverco and share with me if this was a useful blog! I am so excited to keep sharing these free printables and lessons learned with you to use in your growth journey! I'm a big big fan of cheering other people on-so I'm all ears always and have a lot of pom poms waiting for you! Go get em! 

Love and hugs,

Amy

THE GOOD MOOD FIGHT

He's a prideful fighter. He says things he ends up regretting.

I'm an emotional fighter. I take everything personally and focus on him vs. the problem.

Sound familiar?

The point is: we are NOT good fighters. We know this. The prideful fighter and the emotional fighter do not fight well.

Maybe neither of these fighter personalities are you. Honestly, there aren't scientific fighter labels, and if there are, I'm still no scientist. But, you can probably label the kind of fighter you are. Angry, emotional, bitter, prideful, stubborn, close minded. Do any of those sting a little when you read them? Maybe that's your fighter label; maybe that's your spouses. 

If you're reading this, I imagine you want a tiny nudge towards healthier fighting.  

So here's the deal: Blake and I have had to work diligently to figure out how we can healthily fight without making things worse. And yes, if you're asking yourself-is there really such a thing as "good fighters?" 

The answer is yes. There are.

I want to help you learn (with us) how to be better fighters.  Because at the end of the day, no matter how big (finances, sex, children, infertility, jobs-etc) or small (dirty dishes, changing diapers, toilet seats) the fight may be: we all will fight with those we love most at some point in our relationships. And if you ask me, it's not even worth fighting if there's not a resolution at the end, right? Not a compromise, but a resolution. Do you ever finish arguing with your spouse and walk away thinking, well that was completely pointless!  (insert emoji with hand raised here). That's not what we want. We want resolution.

What I've learned from countless hours of marital counseling is this: we are ALL created differently. We think differently, act differently and speak differently. We all have our faults. Different things trigger different emotions in us all, so even if we have all intentions of having a good fight, one small statement can completely derail that train and lead it down the wrong path.  We must remember that no matter how strongly we feel about a topic, your significant other may have just as strong of feelings about the complete opposite. 

BUT, be so very grateful that we weren't created the same. Use those strengths and weaknesses in you and your partner to learn and grow from one another. I hate to be the bearer of bad news, but you probably won't change that person into the dream man or woman you want them to be.  There will always be something (even if it's ever so small) that we dislike about our partners- and we must do everything we can to shut that desire for change down. Because that is one of the most dangerous desires in a marriage, and I'll be posting about that topic soon. 

So sweet sweet sister, or brother (probably not, huh?)

Here I am getting on my knees in front of you-begging you, pleading with you and asking you to please please please implement these steps in your relationship if you too are bad fighters.  You're here for a reason. Right? You're reading these words for a purpose. Right?Use them, share them, believe them and let me know if they worked! Maybe you learned something that I too can implement, and I'd love to hear! 

This may seem simple. This may seem silly. But, it's a fine art, and given the right attention, can turn a dull painting into a beautiful masterpiece. 

Here is my three step guide to "The Good Mood Fight"

1. If you feel a fight coming on, or if you even remotely accidentally walked into one unintentionally, and either of you are in a bad mood already: RED FLAG. STOP STOP STOP the fight immediately. If that means walking away, changing the subject, tickling the other person, whatever it is. DO NOT CONTINUE PAST GO! It could've been a bad day at work, a hard day with the kids, a rough night-whatever it was that sparked the bad mood, it will trigger unintentional emotion in the fight. Don't even let it begin.  

2. Choose a time (and location) when both you and your partner are in a "good mood." A neutral location that doesn't belong to either of you. So, not the man cave, GUYS, or the craft room, LADIES!  Maybe you're driving home from date night and you just finished watching an amazing movie. Maybe you just finished having a romantic night in. (read between the lines). Maybe you just made hubby or wifey the best dinner they've ever had. This is when you start the "good mood fight." Start it with these words, "honey (or whatever your pet name is), can we talk about something and not get mad at each other but talk about it calmly? I am so happy with how things are right now with us and I think it's a perfect time for both of us to address some things that have been bothering us cause we're in such a good mood!" Sounds cheesy, right? It is. BUT, every time I do this with Blake he laughs hysterically and already goes into the fight knowing, okay Amy isn't trying to attack me on this subject, she really does love me and just wants to talk! 

3. Be ever so cautious with the words you choose during this good mood fight, because the last thing you want to do is turn this into a "bad mood fight." Try not to use words like "you did this" or "you didn't do this", but rather "I feel hurt when X action takes place" or "it bothers me when X happens because I feel X". Put the focus on yourself rather than the other person. Nobody likes to be blamed. Focus on the problem, NOT the person behind the problem. Never use the words "always and never" because no matter how angry we are, it's one of the most dangerous ways to trigger bad emotion in your partner. And whatever you do-listen. Remove any distractions and listen to your love. They want to be heard. 

Oh and one final step: don't be hangry. Eat some stinkin food before you fight. :) 

So there it is. This isn't a science. Marriage is an art.

Blake and I aren't marriage counselors, but we've been at rock bottom.  We were a signature away from signing divorce papers just over five years ago. 

We've learned that marriage is about learning and growing and developing into better spouses for each other.  There's nothing Blake and I love more than to see each other trying to do things differently for each other! We feel respected, and we feel cherished.

I'll always end these blog posts about our marriage with this-if you feel like you've hit the end of the line, if you feel like you've exhausted every single effort in the book-can you message me first? I'll have one simple question to ask you before you call it quits.

And it's worth having the conversation with me about-I promise.

Why? Because it was the one question I asked myself before we signed our divorce papers.

And it was the one question that saved our marriage. 

"Are you ready to spend the rest of your life without this person?"

My answer was no. 

Love, hugs and so much encouragement being sent your way!

Amy + Blake

YEAR OF LOVE

Such a mixture of emotions leaving 2017.

BUT.

So much hope + so much love for 2018.

2018 is my year of love.

A year where I transition from being an active duty Army helicopter pilot to a stay at home mama, serving in the Army reserves. To continue my love serving our nation.

A year where I lean in more with my relationship with Christ. Where I show Him more love through acts of discipline and dig deeper into His word.

A year where I prioritize my marriage more than I ever have. Where I am intentional in dating, compromising more, caring more, respecting more and loving more. 

A year where I focus on the kids and their development-emotional, physical and spiritual development. Where I show the kids just how much I love them so.

A year where I put my heart and soul into this business. Where I share my indescribable love for holidays and traditions and can share that passion with you.

Which is why I designed our Valentines collection. To share in my quest for loving myself and loving others more. To inspire dating your lover, to inspire acceptance for others and to inspire a love for self. 

So what's 2018 look like for you? I'm eager to watch you grow this year too. 

You can shop our collection here. 


NEW YEARS BREAKFAST

Every New Years Eve breakfast, Blake makes us homemade biscuits and gravy.  It's a tradition we've shared for six years, and we are so excited to continue it with the girls as they get older! 


Here's the recipe for Blake's favorite biscuits + gravy:

Biscuits:

  • 2 cups all purpose flour
  • 1 teaspoon sugar
  • 1 tablespoon baking powder
  • 1 teaspoon salt
  • 8 tablespoons cubed butter
  • 3/4 cup (more or less if needed) milk

Gravy:

  • 1 lb. sausage (we use maple sausage, but if unavailable use maple syrup to taste)
  • 1/4 cup all purpose flour
  • 2.5 cups of milk

Directions:

Preheat oven to 425 °F.

In a large bowl combine flour, sugar, baking powder and salt together. Cut butter into mixture until it begins to look like cornmeal.

Make a well with flour mixture and slowly add milk into the middle. Knead dough with your fingers and add milk when necessary. Roll out dough onto a lightly floured surface and roll out to desired thickness. Cut with small biscuit cutter.

Butter bottom of skillet and place biscuits in pan. Bake for 12 minutes or until golden brown.

Cook sausage until there's minimal red remaining.

Pour in milk and flour.

Stir well, turn to medium heat until boiling then simmer. Let sit until thickens to desired thickness.


Enjoy!!! And Happy New Years from us to you!